Pitmaster T Build Series - Funkotorium Project (Ongoing Thread in 9 Parts)

I want to build one of these, but I don't see it happening, no place to put it here!:laugh:

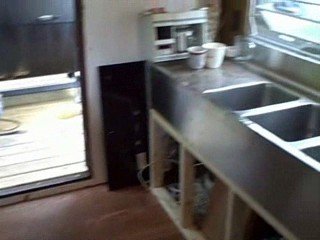
You know... that's one reason why I let it go. I figured... subtracting what I removed from it, sink, power supply,, water pump, smoker, I bought it for 500, put 2000 grand in it - so that's what... 2500 right? Sp it was after Ike and I was moving back to Texas and had two cars... so something had to go behind my U haul... the other car came via a transporter (which was repossessed when my job fell through). I had some people offer to bring it too. And guess what the Job was? I was going to be a fleet manager for my sister's new company that took shuttle vans and turned them into mobile glaucoma units. Anyway I figured it would be a year before I was ready to do any Qing... so that meant stowage. RV stowage was 99 a month. Doing the math and adding the extra cost of transporting the unit-- well I figured in an area that was going to have either a TON of campers damaged from the storm or available when people move out of them into their newly repaired house... I would be ahead.

Meanwhile it is where it is... being used as a 4 wheeler storage... the guy just drives up the ramp, LOL.

Then I find out how many times it could have solved my money woes... but I think as much as I had on my plate.... it would be a distraction Chris... I needed to get my credentials for teaching. I did.

There are so many things I'd change when I do another one. But we need to get my wife earning some decent money.
 
Yeah I don't have GE on this computer and I cant seem to save the google pic of it. The google on 1793 New London HARTFORD turnpike oakdale Connecticut is ... well judging from the picture must have been 2007 - Summer.
 
Man, Donnie.......that's a competition, catering, general BBQ'ers DREAM RIDE!!! Diggin this thread so far. Keep it comin!

Farkin awesome!!!!!:thumb::clap2:
 
It was a REAL marriage saver too. LOL one of the things we noticed when we got to Texas was my wife and I argue and bicker a lot more. Now some of this was because of my stress (school and classes) but also because we went from me making 70 Gs plus 25 or so cleared with BBQ and my wife making around 28... we were comfortable, plus I had money rolling in for the rents on those trailers. All that is a HUGE decrease in lifestyle.

But she commented the other day that she loved the house being EXACTLY as she left it when she got home because I was either working on it, earning money to pour into it or the Smoker (which cost a lot) or cooking in it or staring at it.... LOL I had a TV and computer, fridge and toilet and shower so there was no need to even come inside to shower... Plus there was never a mess in the kitchen anymore.

We want to move to Dickinson... sadly, not money as Mels job is tenative and pays little. But if we do... a spot and limited restrictions for this will be a factor.
 
That is awesome! I feel just plain lazy now with my build!!
 
That is awesome! I feel just plain lazy now with my build!!


I found, and the videos coming up will prove, that if you move your beer out to your project in a fridge, actually inside your project, you will be closer to your beer and work.
 
Part 4 - Winch Base

Part 4 - Building the Winch Base

This part has less pictures and I am sorry I did not take stills of the process as I went. I wanted the base of the winch to be hidden so it went below the deck plug. Not shown either is the arrangement I made to pull it off.. which was simply a detachable piece of 2 x 2 8 gauge square tubing that had a pulley on it for the cable. It attached to the tongue and went forward of the tongue about 4 feet, laying on the ground. In this way the pit could be pulled with the winch still in it seat to the rear, but pulled from the extension far forward of the tongue. Once it reached it maxium position forward you could roll the pit away. I used it maybe 2 times as the Meat Mama stayed on the trailer for most of 2007-2008.


Pitmaster Build Series - Funkotorium Project - Part 4_0008.jpg

I welded two 1 x 1 square tubing section between the existing cross beam and the new support beam you saw me cut in Part 2. On top of that went a 7 inch wide plate of 8 gauge and then bolts were adjusted to accept the slots in the winch. By pulling the winch backwards and lifting it would come off.

Pitmaster Build Series - Funkotorium Project - Part 4_0009.jpgPitmaster Build Series - Funkotorium Project - Part 4_0010.jpg

Here I am pointing at the plate and showing where the winch goes.

Pitmaster T Build Series - Funkotorium Project Part 5_0005.jpgPitmaster T Build Series - Funkotorium Project Part 5_0006.jpg
Winch under pull and at the end. It had trouble pulling when it was close due to it pulling more down than rearward. I changed the pull point on the pit and it was solved.

Pitmaster T Build Series - Funkotorium Project Part 5_0007.jpg
Winch stowed away (along with its 8 foot remote cord). Deck covers the area. The power supply for the winch was connected by a plug I installed that was hooked to the 12 volt on the trailer.


Next Segment Tomorrow -
Part Five - The Congress, April 26, 2008


Be sure and subscribe, there are still 5 parts to go.
 
The Jack gets removed... LOL I think tomorrow's section will show how it all works.

I never thought I'd take it off all the time so three bolts and the jack is off. Heck I left it off and used a lightweight car jack I kept in the back, which was what I used when you see the film tomorrow.
 
Part Five - The Congress

Part 5 The Congress


Pitmaster T Build Series - Funkotorium Project Part 9_0007.jpg
Funktorium with its "heart" Purring away for the first time.

"Congress" means; a : the act or action of coming together and meeting b : coitus.


I had made a lot of plans to get this contraption together. I laid out the Meat Mama before I even considered a trailer. I was surprised there was only one SNAFU in the while project. Even the math of tongue weight (which I never calculated - just guessed) worked out pretty well with a tongue weight of 750 with the Pit on. If your wondering, apparently I removed a lot of weight and then replaced it with a lot of smoker. I did sort of wish I had used a single sheet of 8 x 4 diamond back. Believe it or not it would have been lighter than all that decking and 4x4's. But, it was a nicer look. But I did have WOOD storage in the back of my mind and just figured that any weight I need to remove off the tongue could be offset by the water in the rear.


In fact, I never thought of something until this day. The Water Tank (40 gallons) came and were going to be stored in the back end which might have made the tongue light (without wood) but I never put the tank back in (using hosed in water instead). The Snafu was I elected to NOT copy the Southern Yankee design and place the ash eject UNDER the firebox and instead I made it on the side. This needed to be fixed but I never got around to it. And I have mentioned I never thought about the mess from the shelves.


On April 26, 2008 the two Behemoths came together. The Meat Mama 3000 and the Funkotorium. The video below shows the entire process. I was a bit winch shy but I had purchased a really cheap winch (in case it did not work). I could always get a one TWICE as expensive at 40 bucks next time, LOL.


Pitmaster T Build Series - Funkotorium Project Part 5_0001.jpg
First, shown here, I am about to lower the tongue to the ground. I had to mod the pit base supports between the legs to clear everything. As mentioned the pits did not often come off. But when they did, a simple and fast removal of three bolts and the trailer jack post was off.

Pitmaster T Build Series - Funkotorium Project Part 5_0002.jpgPitmaster T Build Series - Funkotorium Project Part 5_0003.jpg
Here are the removable ramp tracks being fastened

Pitmaster Build Series - Funkotorium Project - Part 4_0001.jpgPitmaster Build Series - Funkotorium Project - Part 4_0002.jpg
Pit is rolled into position and wheels get removed. I often just winched it from the smaller trailer I had made. It too had the track system. I had the cut outs for the lock downs but never welded them in before I abandoned the project so don't ask.. LOL. The Ramps popped right on top of the trailer, which I towed with my lawnmower. You can see me use both in the first video of this series.

Pitmaster Build Series - Funkotorium Project - Part 4_0004.jpgPitmaster Build Series - Funkotorium Project - Part 4_0005.jpg
Throw back to Dad or throwing one back for Dad. I drank his favorite beer and my first taste as a child (yes a child). Other than the brew my Dad used to make at home (which tasted like Sam Adams Octoberfest), regular Budweiser was his beer early on. Another great thing about my Funkotorium is the RF that came with it... nothing like having a frosty mug available at all times. Budweiser was the ONLY beer I allowed on board too... it was a way to summon the spirit of my Dad I guess. The taste and smell plus cut grass and the scent of the exhaust from a 4 cycle engine - all combined - was a time machine to when he let me have my first sip as a 5-6 year old - a reward for getting him a cool one from the fridge. In the shot to the right, you can't see it, but I am using a pipe to line up the pit to the tracks.

Pitmaster Build Series - Funkotorium Project - Part 4_0006.jpgPitmaster Build Series - Funkotorium Project - Part 4_0007.jpg
Winch Underway! There were two hang up points. One was the weld under those tracks caught up on the edge where the removable ramp and the Trailer ramp would bend. I would simply jiggle and it was on its way. The winch had a 8 foot or so power cord so I could walk around and wiggle and jiggle.

Pitmaster T Build Series - Funkotorium Project Part 5_0005.jpgPitmaster T Build Series - Funkotorium Project Part 9_0008.jpg
Meat Mama in all the way, second shot was the deck painted but shows the winch stowed away and plug in. All nice and hidden.


Last edited:
Really really nice!
The car jack worked great.
Was that winch cable above the crossbar of the trailer or dragging over it?
 
next time I'm down in the crystal mall area or salem prime cuts I'll have to do a drive buy and get an eyeball on it
 
Part 6 - The Commissary

Part 6 - Building out the Commissary


The whole reason to have a trailer in the first place is really covered here. I could always pitch a tent or sleep in my truck, I could always tow the smokers with the trailer I already had made from an old popup camper frame, but nothing could replace a facility on wheels that did all three.

Pitmaster T Build Series - Funkotorium Project - Part 7_0008.jpgPitmaster T Build Series - Funkotorium Project - Part 7_0015.jpgPitmaster T Build Series - Funkotorium Project - Part 7_0014.jpgPitmaster T Build Series - Funkotorium Project - Part 7_0016.jpg

First thing for Dang sure was to keep this nice bathroom, sink, vanity, toilet and shower. Sure I could have gutted this and made the whole commissary REAL big... I even thought of making it where my coolers went. The vent you see above had a 12 volt fan for exhaust.

One day I had my smoker on the ground next to the trailer and was cooking for a big party that as going to be at my house that evening. I started the whole thing off early as we all do and at some point all my work had been done for the day until it was time to serve. My wife left and locked the house door and I simply took a shower on board. I felt fresh, refreshed, clean and cooled off. I never had that experience before as often times pitwork means you are going to be dirty and sweaty for hours before service and DURING service. The party went off and I made it look so easy.

So... I kept the restroom and shower. As mentioned before, when the HD inspected this I thought there would be an issue. All I had to do was show them the toilet was a separate tank. The inspector said he liked the thought that a sole operator at a fair would be more tempted to use a facility there than have to chose to leave the operation to go somewhere else. The convenience of the "head on board made it less likely to pee in a pickle jar" he said.


Pitmaster T Build Series - Funkotorium Project Part 6_0001.jpg

Base for the counter top, warmer (also from restore at cost of $50) hand sink, cutting board storage, cabinets, and gas stove and oven. The red marks are for where the power was. I will handle electrical at the end when I list my mistakes and recast a suggested order of construction. The base is made of 2x1 construction, as were the new walls. You see a plywood backing for extra strength. You see if this was going to be the service side I could envision the need for extra strength here because I might install a removable small counter for plate to be set on, relish and what not. There would be a set of steps outside for clients to reach the window but I have seen a lot of trailers where customer simply has to peer way up and grab an order that may be over their head.


Pitmaster T Build Series - Funkotorium Project Part 6_0006.jpg

Ready for the Window Installation (which should have been first). To the far left, against the wall and under that coffee machine and the hand sink was a perfect cubby for my large Cambro when I wasn't using it.

Pitmaster T Build Series - Funkotorium Project - Part 7_0007.jpg

There was a wall to finish and a window to install. The window was from REStore - Habitat for Humanity warehouse. Actually it was a top sash but worked nicely as a side by side. If not stationed at tables outside, this would be the service window. The best setup was service outside. The trailer totally rocked this way. I never got to serve out the window but it was there in case I needed to.


Pitmaster T Build Series - Funkotorium Project - Part 7_0021.jpg
Counter top installed, stove, everything but the front on the warmer and trim.

Pitmaster T Build Series - Funkotorium Project - Part 7_0022.jpg

Hand sink right as you walk in from the smoker. The three bay sinks will be discussed in the plumbing section.


The Video


YouTube - ‪Pitmaster T Build Series - Funkotorium Project Part 6 (Commissary)‬‏
 
Part 7 - The Ceiling

Part 7 - The Ceiling

I had a few issues with the ceiling so I spent some considerable time on this.

For one, most every beam in the ceiling from mid point to the front was rotted in some portion. I do not know why I sistered them and had I to do it all over again it would have been just as easy to do them as a full member left to right.


Second, the electrical (120 Volt) needed to be rerouted and I wanted a mixture of 12 volt light and some halogens if I was plugged in. I also knew I would be routing USB cables from the rear to the front for my Pit monitoring sensors and also considerable wiring for any audio. I settled on a 2 piece installation of the fiberglass material with a nice wood trim piece right down the center. In this way I could always pop off the wood trim and let the ceiling sag to get at whatever I needed.


Pitmaster T Build Series - Funkotorium Project - Part 7_0002.jpg
I am pointing to the cabinet that is on the right side of the trailer. This were cool cabinets but I knew limiting. They were nice in that the doors swung up and locked there but they also were limiting as far as getting at things quickly. I had gotten some free rubber coated white shelving and knew that was going to do the trick for storage of anything from spices and supplies to my servers (Styrofoam and paper goods). I kept the ones in back but these had to go. There was a light under them and those wires served the entire right side of the camper. I had to be careful.

Pitmaster T Build Series - Funkotorium Project - Part 7_0004.jpg
You can see evidence of water leakage and those 12 VDC wires.

Pitmaster T Build Series - Funkotorium Project - Part 7_0005.jpg
Taking the old Ceiling down. Wires being pulled.

Pitmaster T Build Series - Funkotorium Project - Part 7_0006.jpg
Insulation down, wires down and new beams installed.

Pitmaster T Build Series - Funkotorium Project - Part 7_0009.jpg
Pitmaster T Build Series - Funkotorium Project - Part 7_0010.jpg
First sheet up and center trim going up as well. Hole for top Vent roughed in.

Pitmaster T Build Series - Funkotorium Project - Part 7_0012.jpg

Routing the 120 VAC wires on the left side.

Pitmaster T Build Series - Funkotorium Project - Part 7_0013.jpg

Left Side Paneling going on.

Pitmaster T Build Series - Funkotorium Project - Part 7_0018.jpg
Ceiling, Lights, Walls, Counters all done. The wires in the corner were for the Stoker system to hook to. A wireless game adapter would broadcast the signal from the Stoker (which operates the fans on my pit via the internet) to a laptop in the rear or in a house or even a hotel room in close proximity. There were on-board cameras too.

Pitmaster T Build Series - Funkotorium Project - Part 7_0020.jpg
Looking in the Same Place where we started, cabinet down, ceiling up, trim up.

The Video


YouTube - ‪Pitmaster T Build Series - Funkotorium Project - Part 7 (Ceiling)‬‏
 
Last edited:
Part 8 - Plumbing

Part 8 - Plumbing


Oddly enough there was not much here to do mostly because I purchased a trailer with an existing water system. There was little routing to do and basically all I had to do was install a hand sink on the left side on the counter, a process of just extending the water and waste lines maybe 3 feet and a 3 bay sink on the right side that was required by the HD. This simply tapped into the shower and lav water supply. Now the system worked great if I had a water hose attached, and granted I never got the tank re-installed but the pumps were in working order when I removed them.

Basically let imagine what I was going for. The water system operates in two ways. First their was 40 gallons of fresh water supplied by a tank, a 12 VDC supply pump that would come on every time you turned on the facet anywhere. The lines were always under pressure. In addition, should you have a hook up, you could run pressurized water straight from a tap. This is what I did the most as I never finished the system before I left.

Waste water was approved and treated this way. Drainage from the SHOWER and the TOILET went into a 50 gallon tank that was under the floor. The Lav, hand sink and three bay sinks went into an identical waste tank yet was completely separate from the shower and head.

I had to move the dump for the tanks to the opposite side of the service at the request of the HD. That was no big deal as it was PVC.

In the Video below it simply shows me defrosting some meat and not much else. I had hooked up the hot water heater maybe 3 months before I left for Texas. I used an LP "on demand" and NEVER ran out - EVER, even when taking a shower, albeit when I took a shower I rarely wanted a hot one.

Pitmaster T Build Series - Funkotorium Project Part 6_0004.jpgPitmaster T Build Series - Funkotorium Project Part 6_0005.jpg
The Sink base is of 2x1 construction. The wall to the right is the Lav/Shower wall. The proper water and waste tap (to the lav waste) was easily accessed.

Pitmaster T Build Series - Funkotorium Project - Part 7_0022.jpgPitmaster T Build Series - Funkotorium Project Part 8_0001.jpg
Hand Washing sink on the Left side (counter) right as you come in.

Pitmaster T Build Series - Funkotorium Project Part 8_0002.jpgPitmaster T Build Series - Funkotorium Project Part 8_0003.jpg
This area (three bay sink) is important in that it serves so many functions. When you first set up it is where you open, drain, wash off you meat and if you are wise you will rub, slather and inject there as any mess just washes down the drain. I had intentions of installing a washer wand that ported straight up maybe 2 feet then had a mounted on flex hose that hung back down. This makes for easy clean up as you can just wash it down.

I had come across these two irreplaceable THICK stainless pans that I often sat the meats into when they were processed. Here they are lined up.


The Video

YouTube - ‪Pitmaster T Build Series - Funkotorium Project Part 8 (Plumbing)‬‏
 

Attachments

  • Pitmaster T Build Series - Funkotorium Project Part 6_0007.jpg
    Pitmaster T Build Series - Funkotorium Project Part 6_0007.jpg
    18.8 KB · Views: 218
Back
Top