GrillinFool
Full Fledged Farker
- Joined
- May 8, 2009
- Location
- St. Louis
I know there are more than one way to skin a cat because of the common saying, not from personal experience. As for skinning a pig, I don’t know if there are multiple ways to do it, but this is how I did it and the result was a pig that was head and shoulders better than the one we did last year. The problem with doing a whole hog without skinning it is that you can’t put any rub or sauce on the skin as the skin is pretty much inedible. It’s tough and leathery. They call a football a pigskin for a reason. It’s made from the skin of a pig. As my mentor on skinning a pig, and Whole Hog Winner at Memphis in May, Skip Steele (owner of Bogart’s) said, “It’s like trying to get smoke flavor inside a football. It just doesn’t work.”
So I skinned it this time. So what does skinning the pig gain me? It’s not an easy process the first time. Skip was done in 20 minutes including the time it took to give me tips and advice. It took me a lot longer. Is it worth it? Yes. By skinning the pig, I can season and rub the outside as well as hit it with some sauce, not to mention allow the smoke to penetrate. All of which made this pig infinitely better than the last one.
Words of warning – The quickness with which you get this done is directly proportionate to the sharpness of your knives. I had my Shun chef and santoku knives sharpened professionally right before I did this, not using them for anything before I sliced into the pig and as you see below, I had to switch from one knife to another about 2/3 of the way through and should’ve done so earlier. Don’t expect this to take less than an hour with a dull knife.
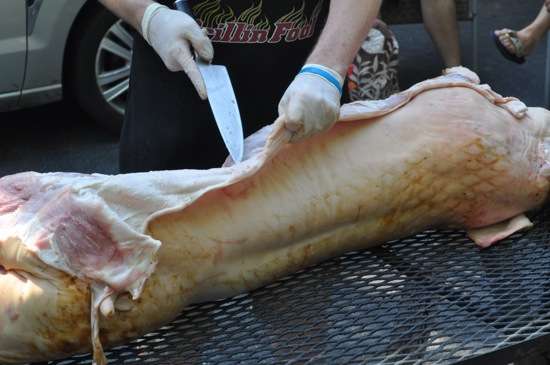
I made my first incision along the edge of the stomach from foreleg to hind:
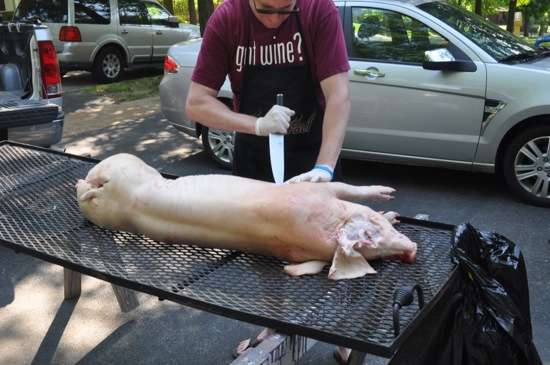 The First Cut
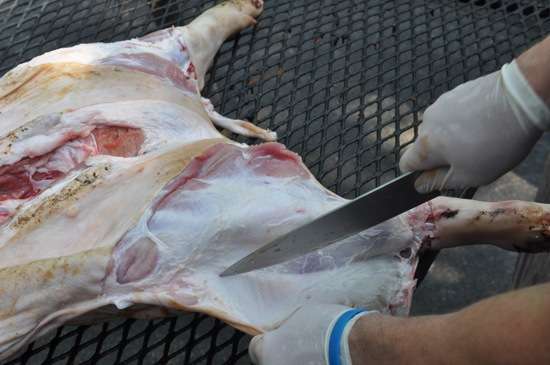
From there I pulled the skin back and made small swipes with the tip of the knife where the meat connects to meat and fat, pulling the skin as I go to separate it from the pig:
 Skinning along the Ham or Rear Leg
As you can see, I left the skin on the stomach. That’s by design. It helps to insulate the meat from the fire and no one sees it anyway, so save the time.
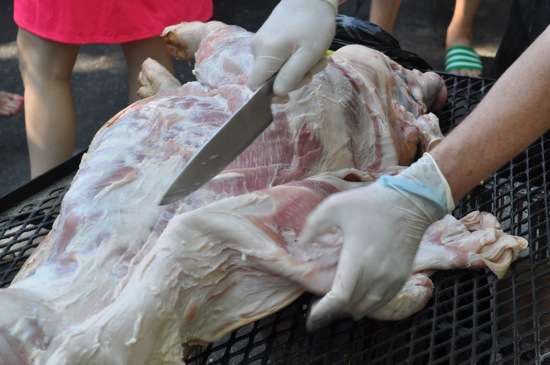
At the legs, in this case a back leg, cut a ring around the ankle and a slit up to the cut made along the stomach and repeat the process of pulling the skin back while slicing at where it connects to the pig:
 Skinning the Ham
Do the same thing for the front leg:
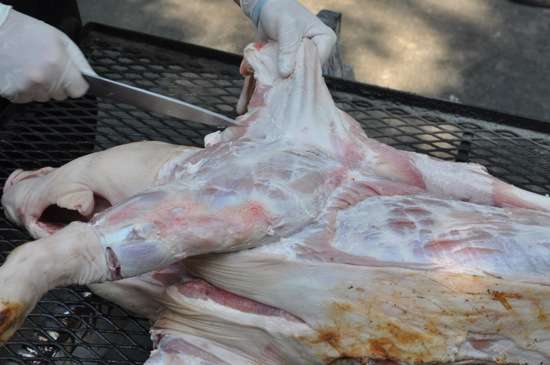 Skinning up the Foreleg
Notice that I’m working on one side and not the other. That’s by design as well. It’s much easier to skin from one side or the other rather than from front to back or back to front.
At this point, I rolled Josephine back onto her stomach to a slice around her neck like I did to the ankles:
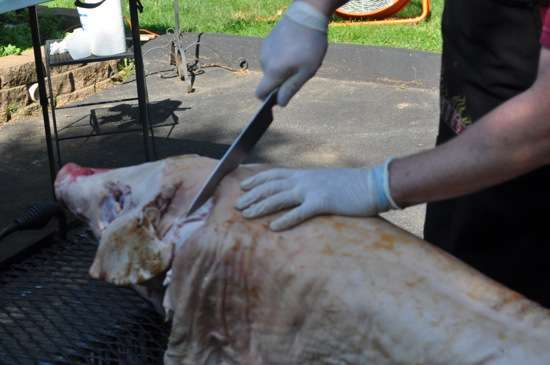 Once the legs on one side and neck are done, it's pretty easy
Once the legs on one side and the neck are done, things move a lot quicker:
 Working Along the Back is Easy
 Moving Now!
Now flip it over and repeat on the other side.
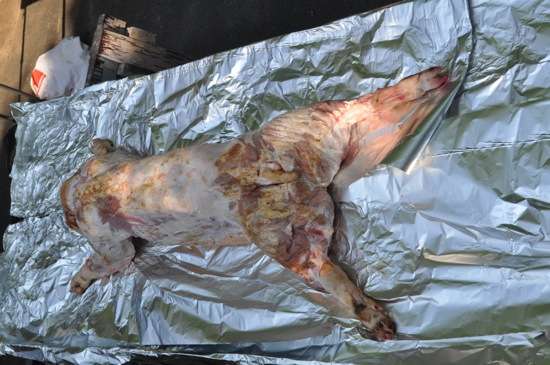
After I carved up the side, I finished up along the back and using my santoku now because my chef knife was already dull at the tip:
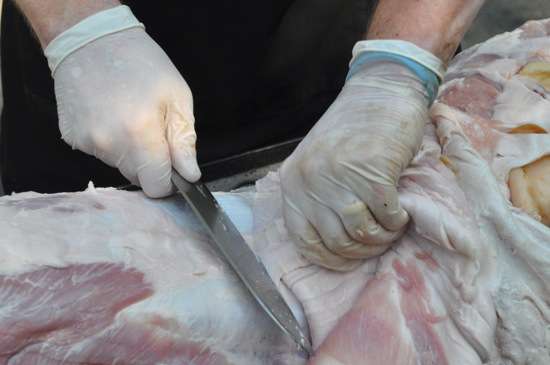 Finishing Up
And here’s the skin:
 Can I Make a Football out of this?
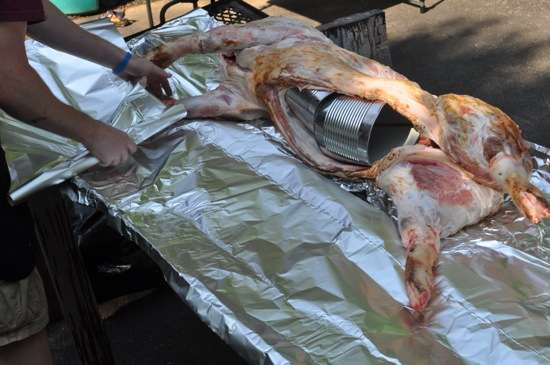
Now onto another trick Skip taught me to keep the pig’s back from caving in once the connective tissue has broken down and the meat is pulled pork. These are two empty 7 pound cans of beans with the labels taken off shoved into the cavity:
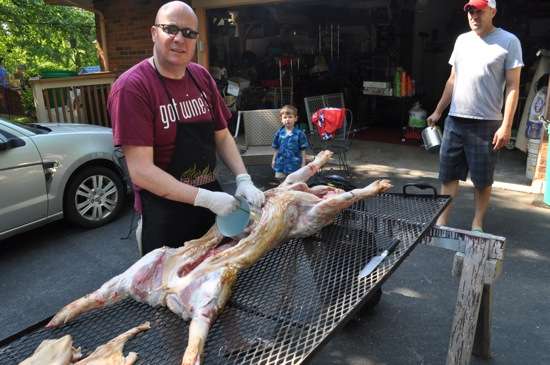 Filling the Cavity
And if you’re wondering about the shirt. It says, “Got Wine?” I feel like there is an S missing from there.
Now time to prep the fire. Most people, including Skip, do whole hog for upwards of 12 hours. I don’t have that kind of time and I’m a big believer in simplifying things and going with the high heat method of smoking at ranges of 300 all the way up to 350.
First, put 60 pounds of charcoal under where the shoulders of the pig will be and forty under the hams and, I hate to say it, use lighter fluid to get it started. There isn’t a charcoal chimney big enough for 100 pounds of charcoal:
 Flame On!
We hate lighter fluid, and don’t use it very often and when we did on Memorial weekend, we didn’t use enough. By the time the pig was ready to go on the grill, the fire wasn’t hot, so we had to improvise. My dad is great at improvisation. He saw the fan that my BiL Kevin brought to keep us cool while the pig cooked and thought, what better way to get the fire ramped up and burn off all the lighter fluid:
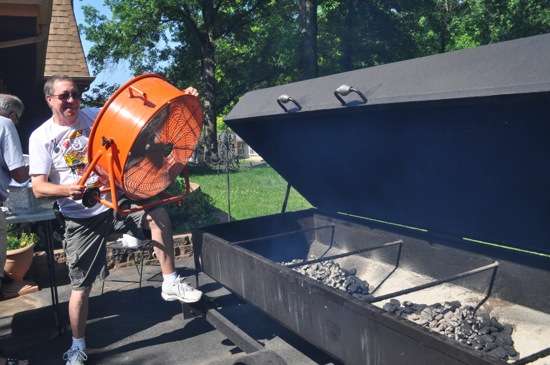 Gotta Love My Dad!
Now back to the pig. You didn’t think we were going to put a pig right on top of 100 pounds of ripping hot charcoal did you? Well, yes we did, but not until we insulated the pig with some aluminum foil:
 Make sure to cover the whole thing
 Fully Foiled
Make sure that there are no holes in the foil whatsoever. The pig has some pretty sharp nails and easily poke holes in the foil which that will be like having a blow torch where the hole is.
Now on to making the pig pretty for the grill. A little pillow to prop the head up and some foil around the ears to make them stick out:
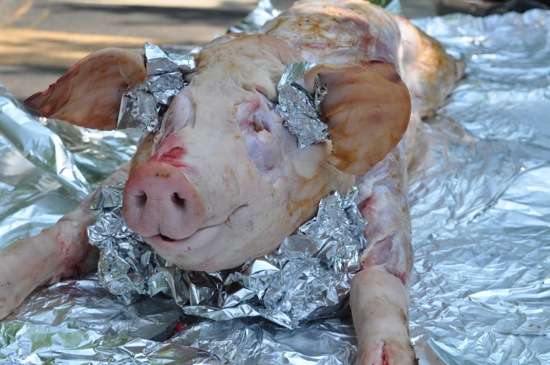 Is it just me, or does the pig look like it’s getting a spa treatment?
Now time to season and rub the pig. First, a heavy coat of coarse salt:
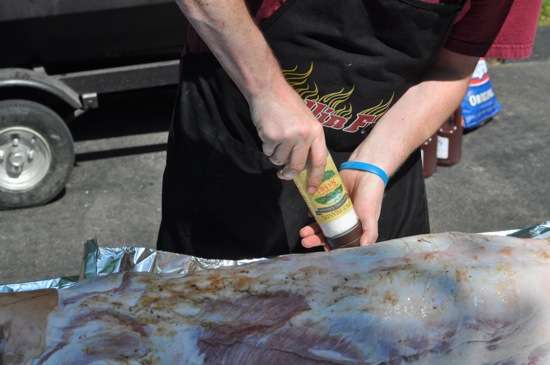 Coarse Salt
Make sure to get the sides
Now hit it with your favorite rub. The one I’m using here has no salt in it, so I salted first
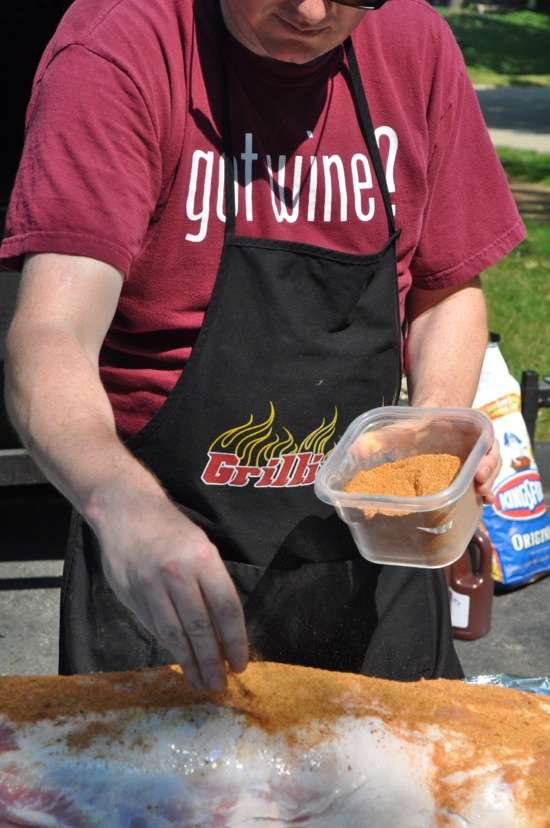 Laying it on Thick
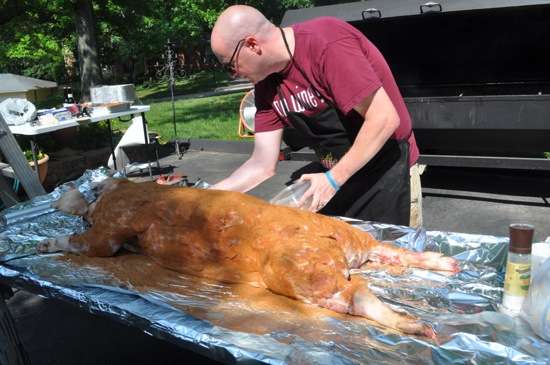 Finishing Up the Side
Josephine on the grill:
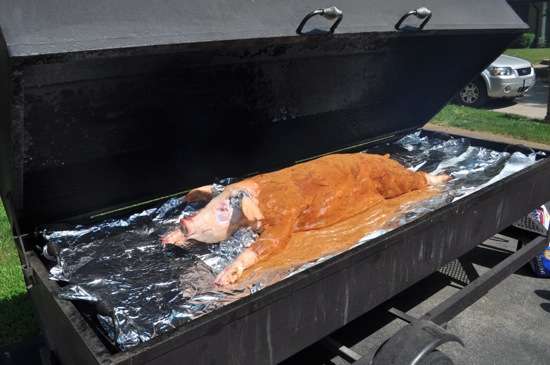 On the Grill
Here I am next to the grill and want to show you one of two problems we had with this pig roast:
 What’s Wrong?
When we positioned the charcoal in the grill, we did so with the expectation that the pig would be closer to the left side of the grill. But after it was skinned, the pig wound up more to the right, so the 60 pounds of charcoal is under the pigs snout and the forty is under the stomach.
The second problem was that we used the same size can in the cavity of the pig that was only 66% the size of the pig Skip showed me how to skin. I’ll show you why that was a problem in a few pictures. Neither of these problems were anything to worry about based on the results, but I wanted to address them.
Before we set the grill grate down, we dropped in about 20 pounds of hickory and peach wood and after we closed the lid, we got a nice amount of smoke:
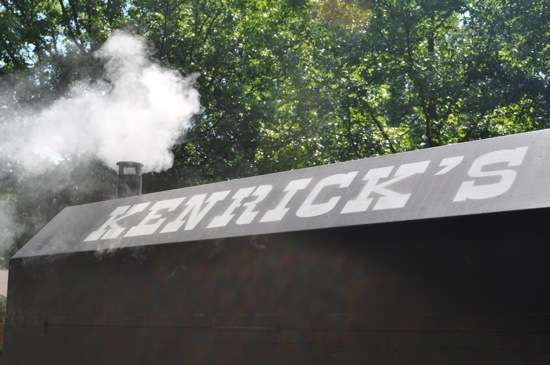 Can You Smell the Smoke?
We also smoked some beans which were simply Bush’s Baked Beans (not the grilled ones because we did that ourselves). Nothing all that complicated. 7 pounds of beans per tray, a cup of brown sugar, half cup minced garlic, quarter cup of the rub (basically what I had left from slathering the pig) quarter cup of honey all mixed together and then one inch squares of bacon positioned around the top:
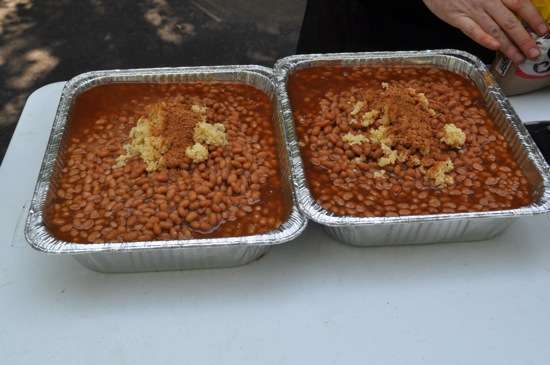 Kicked Up Beans
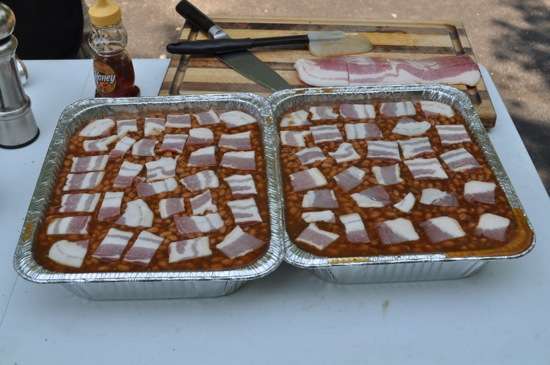 With Bacon on Top
Now back to the pig, 2.5 hours later, here’s Josephine with a lovely tan:
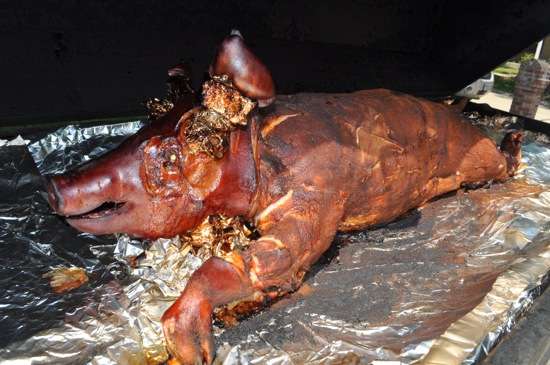 2.5 Hours In
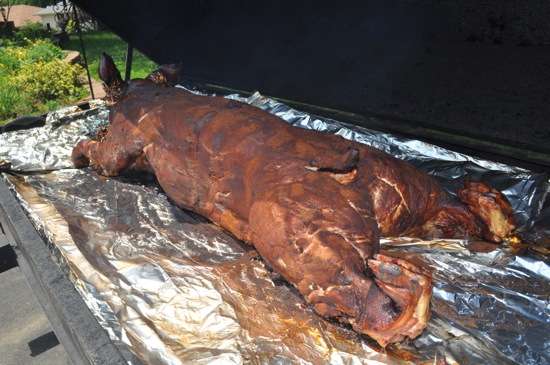 From the Back
Without the skin, I worried that the meat would dry out more quickly than with, so I hit it with a spritz of apple juice before adding more smoke wood:
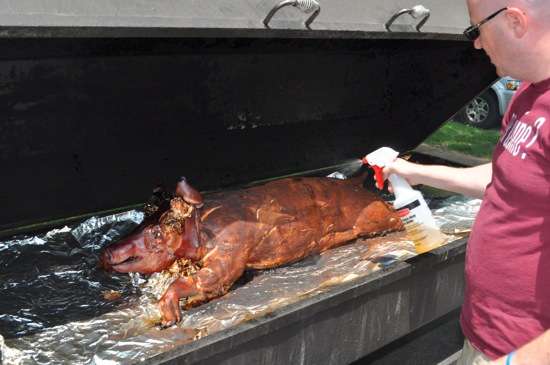 Taking an Apple Juice Shower
At the four hour mark, it was time to make up some BBQ sauce. All I did was take most of a gallon of Sweet Baby Ray’s, add some brown sugar, garlic, honey and beer (oh and I changed into my Luau garb since that was the theme of the party, and yes that’s the same Hawaiian shirt from last year. I only own one.), and you can see the beans are in the back and have been on for about an hour:
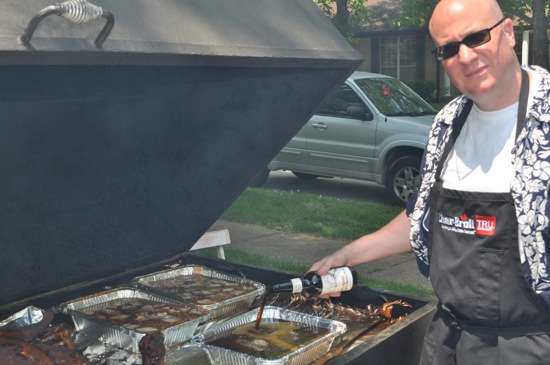 Making the Sauce
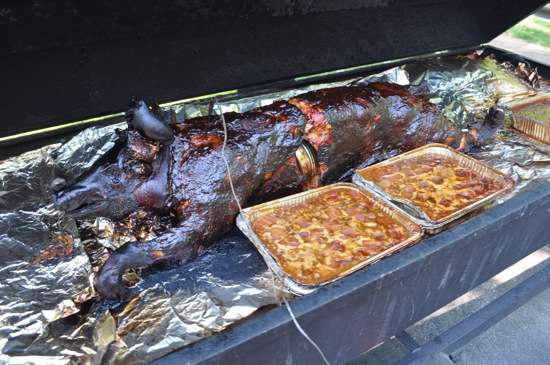
At the four hour mark, we decided to hit the pig with some sauce:
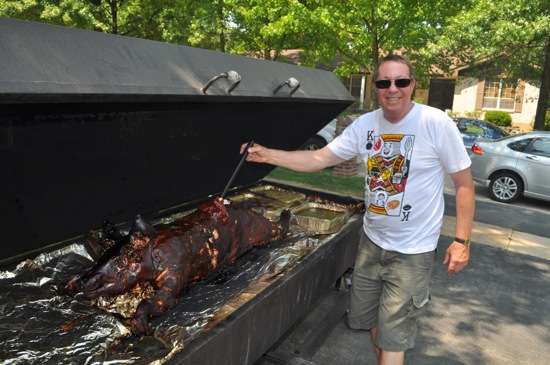 Dad in his King of the Grill Shirt
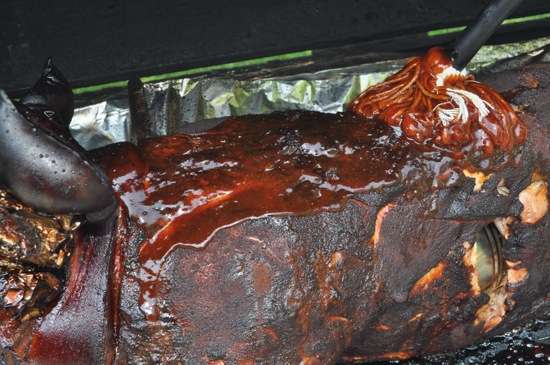 Mmmmmm, Ooohy, Gooey Sauce
Wait, what is that in the above picture below the mop on the right? It was the other problem we had:
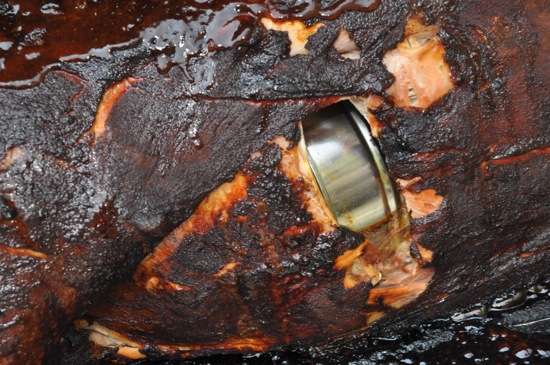 Robo-Pig!
It would seem we need a little smaller can for a pig this size. Those cans work well for a 120 pound pig, but an 80 pound pig is not big enough. It’s not great for presentation, but I’m not putting a dress and make up on this pig, I’m going to eat it.
We added more smoke wood as well.
Here we are 5 hours in:
 Five Hour Mark
We added more smoke wood. Not because the meat will take any more smoke on at this time, but the sauce on the outside will absorb it.
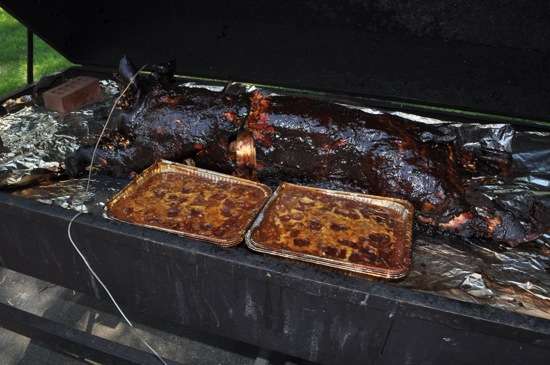
At the six hour mark, we were getting close to our target temp of 160 in the shoulder:
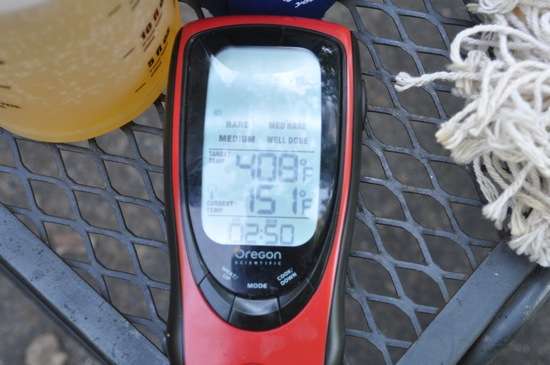 151 degrees, only 9 to go
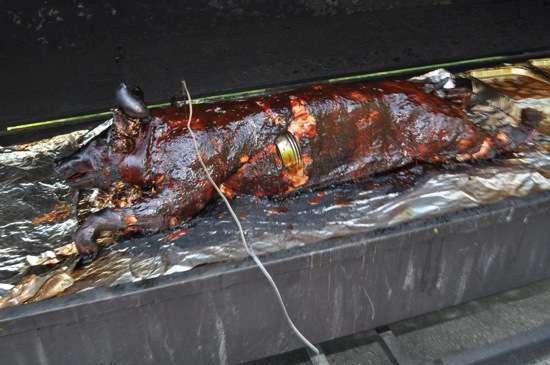
We moved the beans over on top of the heat to get them going at the six hour mark:
 Six Hour Mark
The hole on the side of the pig had opened even farther:
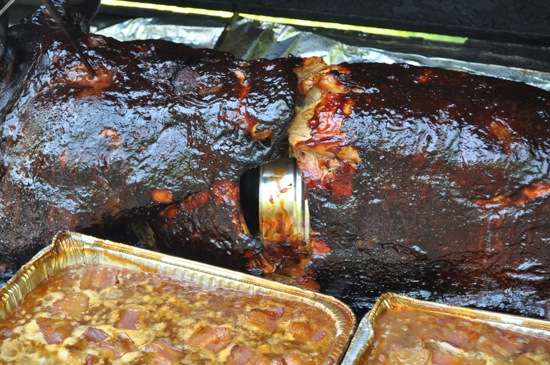 The Hole is Getting Bigger
Here we are at seven hours:
 The Seven Hour Mark
And the temp was sitting at 159. My goal was 160, but time to pull it and let it rest. It will continue to cook while it rests:
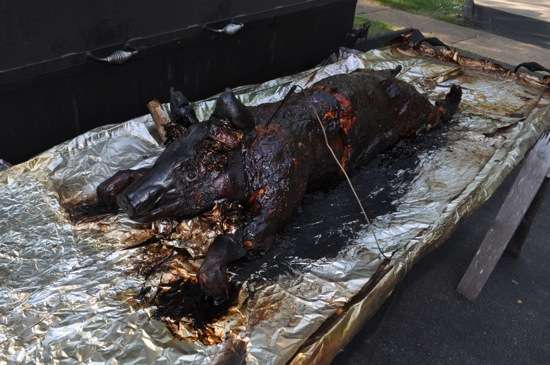 Off the Grill
Josephine chillaxin’:
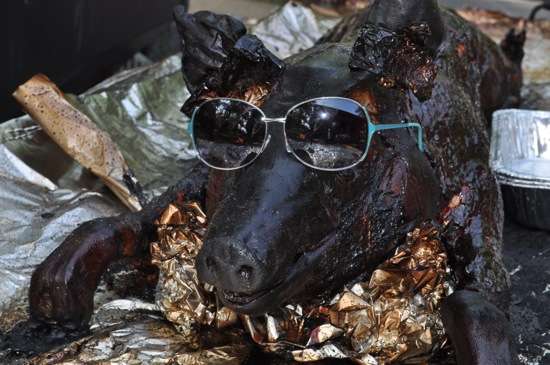 Chillin'
Thanks Emily for letting me borrow the glasses and for taking a bunch of pictures:
 My Sister in Law
That handsome fella behind her is the one and only Joe Bonwich of the St. Louis Post Dispatch. Seeing how he is a restaurant critic, he doesn’t like for people to know what he looks like so he doesn’t get preferential treatment and can make an honest assessment of an eating establishment, but he allowed me to use that pic plus one more of him straight on so you can really get an idea of what the man looks like. See below for a GrillinFools exclusive:
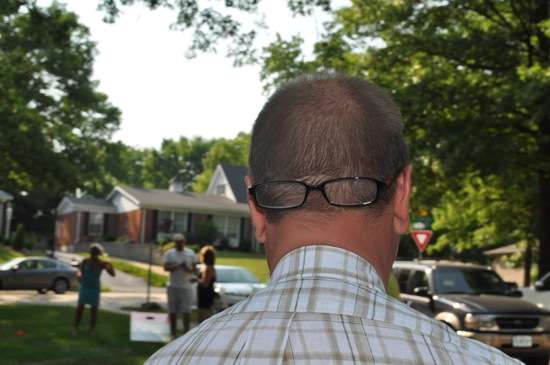 Joe Bonwich of the Post Dispatch
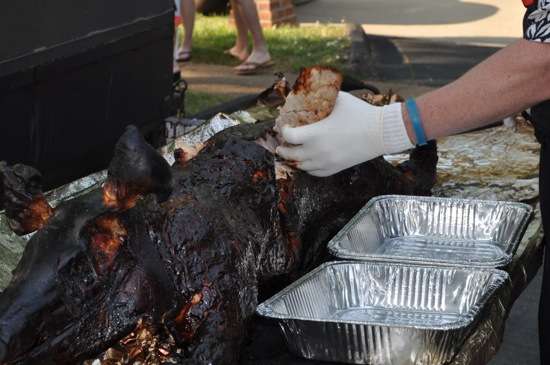
After a good 45 minutes of resting, time to don the gloves and get to work on pulling the pork from the pig:
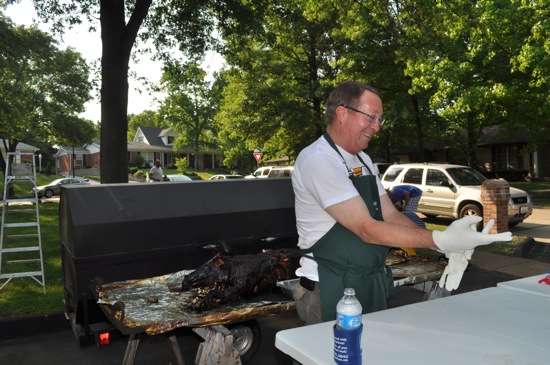 Dad looks like a demented proctologist - Okay, bend over!
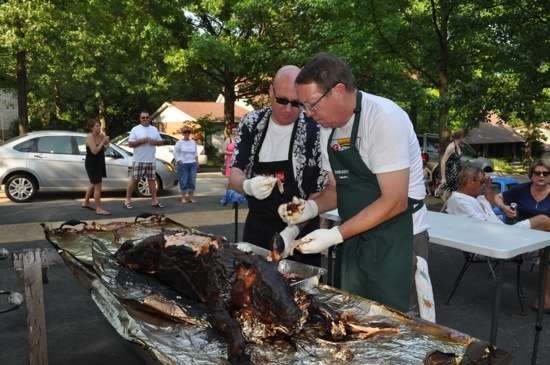
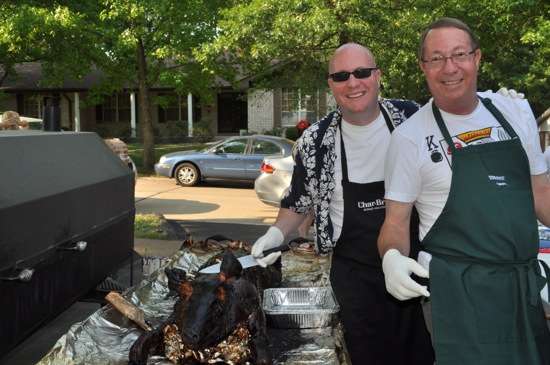 Yes, we look way too excited to be yanking meat off a carcass
Time to get to work:
 Tenderloin Anyone?
Examining the pork and a little quality control or pitmaster’s prerogative, take your pick:
 What do you think dad?
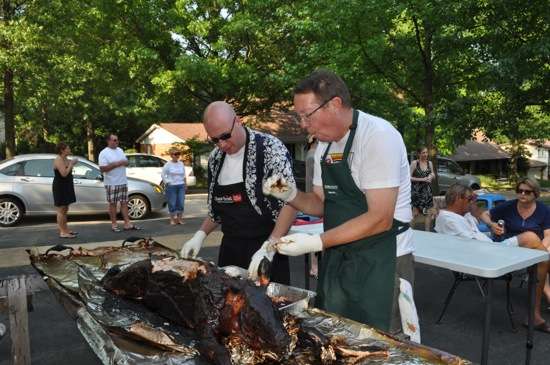 Dad: Only one way to find out...
Enjoy a sample, Carol
And I have to take care of the whomever is behind the camera while we work:
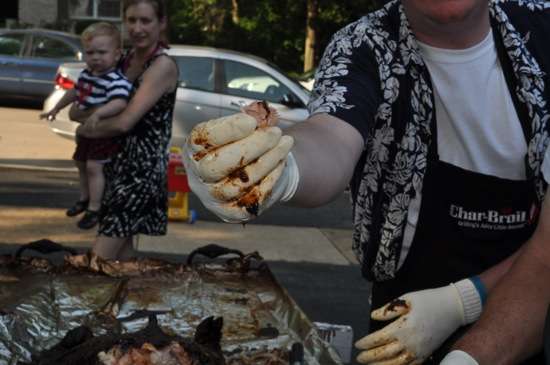 Want a bite?
A close up of the beans:
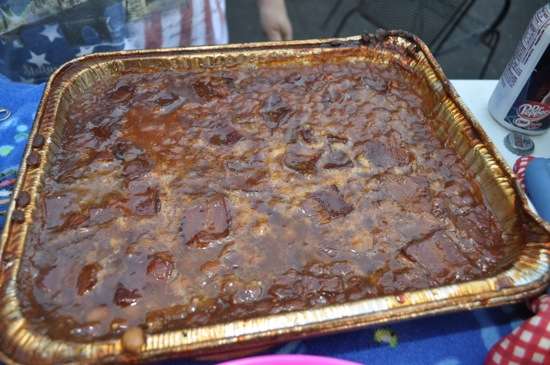 Smoked Beans are so much better than Baked
But what about the pig? Was it any good? Was it better than last year? This picture sort of sums it up:
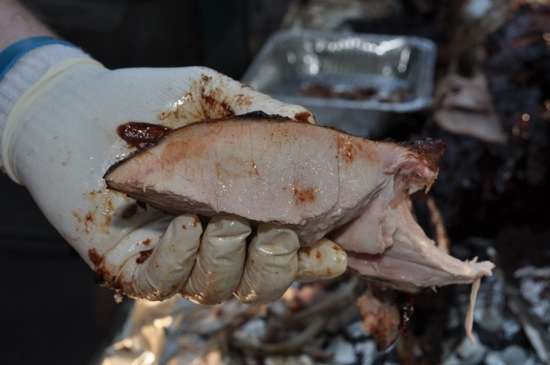 Part of the rear haunch
Why is that picture significant? Because it shows how juicy the meat is, the slight smoke ring around the outer edge, along with the rub and sauce on the outside that all contribute to the flavor. That and all of these people were extremely happy with the pig:
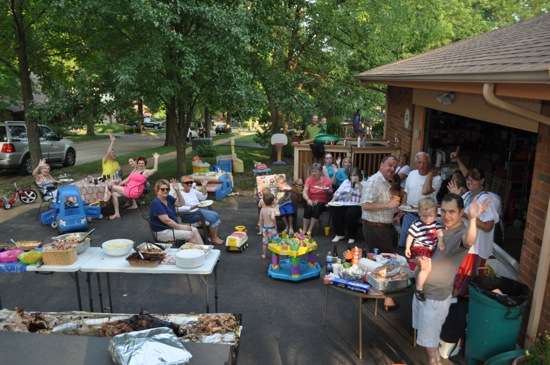 Happy Pig Eaters
They were so happy, this was all that was left, forgive the lousy picture. It was from my phone:
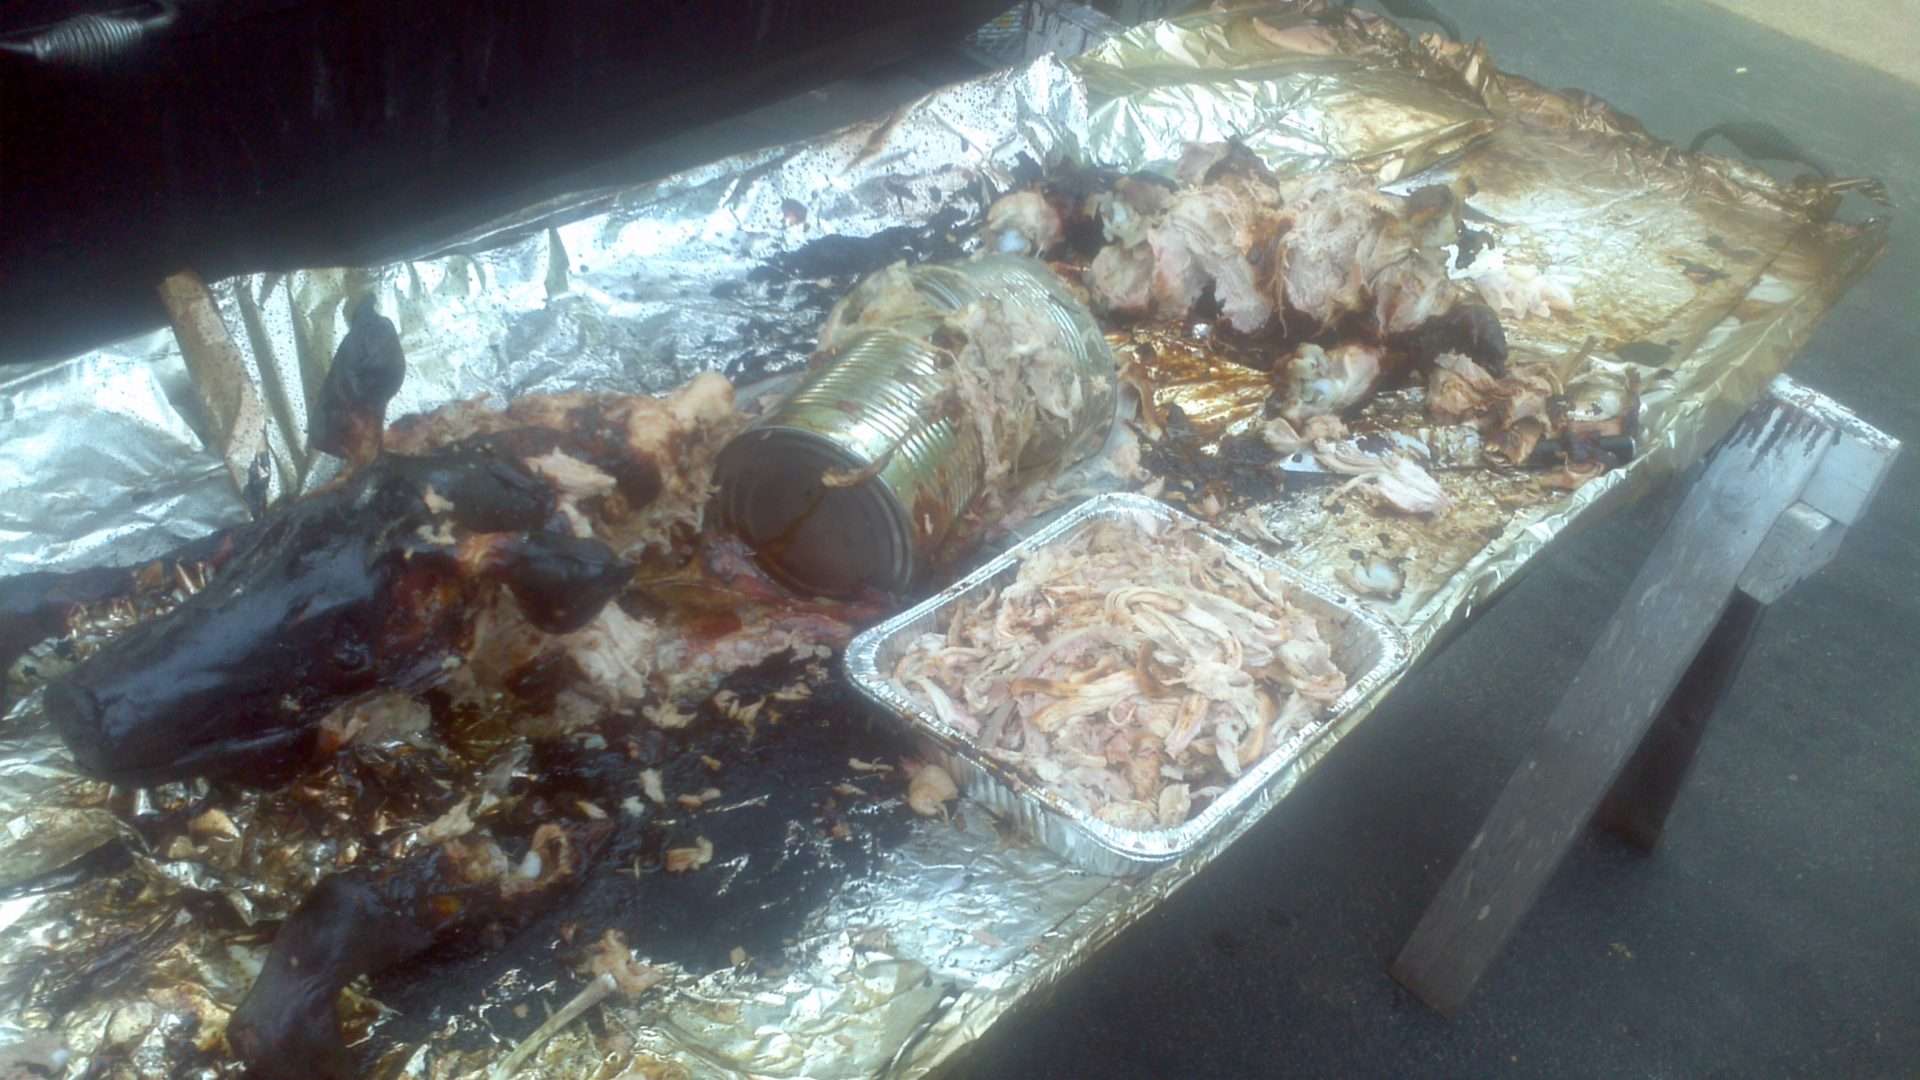 The Aftermath of Pigapalooza
So, when all is said and done, are there any things we could do to improve the process?
1) We would make sure the pig is positioned properly over the coals. The meat in the rear haunches was not as tender as the shoulders. It was delicious and wasn’t tough, it just wasn’t pulled pork tender.
2) We will not use cans that big or get a bigger pig. Either way, I don’t want the side splitting open again. It didn’t impact the flavor, but it did impact presentation.
All in all, it was a highly successful pig roast.
Skinning the pig added 40 minutes of prep to the process, but it shortened the cooking time by about an hour and it made the pig so much better than the one we did last year.
You can follow the Grillin Fools on Facebook and post your own grillin pictures or on Twitter @GrillinFool.
So I skinned it this time. So what does skinning the pig gain me? It’s not an easy process the first time. Skip was done in 20 minutes including the time it took to give me tips and advice. It took me a lot longer. Is it worth it? Yes. By skinning the pig, I can season and rub the outside as well as hit it with some sauce, not to mention allow the smoke to penetrate. All of which made this pig infinitely better than the last one.
Words of warning – The quickness with which you get this done is directly proportionate to the sharpness of your knives. I had my Shun chef and santoku knives sharpened professionally right before I did this, not using them for anything before I sliced into the pig and as you see below, I had to switch from one knife to another about 2/3 of the way through and should’ve done so earlier. Don’t expect this to take less than an hour with a dull knife.
I made my first incision along the edge of the stomach from foreleg to hind:
From there I pulled the skin back and made small swipes with the tip of the knife where the meat connects to meat and fat, pulling the skin as I go to separate it from the pig:
As you can see, I left the skin on the stomach. That’s by design. It helps to insulate the meat from the fire and no one sees it anyway, so save the time.
At the legs, in this case a back leg, cut a ring around the ankle and a slit up to the cut made along the stomach and repeat the process of pulling the skin back while slicing at where it connects to the pig:
Do the same thing for the front leg:
Notice that I’m working on one side and not the other. That’s by design as well. It’s much easier to skin from one side or the other rather than from front to back or back to front.
At this point, I rolled Josephine back onto her stomach to a slice around her neck like I did to the ankles:
Once the legs on one side and the neck are done, things move a lot quicker:
Now flip it over and repeat on the other side.
After I carved up the side, I finished up along the back and using my santoku now because my chef knife was already dull at the tip:
And here’s the skin:
Now onto another trick Skip taught me to keep the pig’s back from caving in once the connective tissue has broken down and the meat is pulled pork. These are two empty 7 pound cans of beans with the labels taken off shoved into the cavity:
And if you’re wondering about the shirt. It says, “Got Wine?” I feel like there is an S missing from there.
Now time to prep the fire. Most people, including Skip, do whole hog for upwards of 12 hours. I don’t have that kind of time and I’m a big believer in simplifying things and going with the high heat method of smoking at ranges of 300 all the way up to 350.
First, put 60 pounds of charcoal under where the shoulders of the pig will be and forty under the hams and, I hate to say it, use lighter fluid to get it started. There isn’t a charcoal chimney big enough for 100 pounds of charcoal:
We hate lighter fluid, and don’t use it very often and when we did on Memorial weekend, we didn’t use enough. By the time the pig was ready to go on the grill, the fire wasn’t hot, so we had to improvise. My dad is great at improvisation. He saw the fan that my BiL Kevin brought to keep us cool while the pig cooked and thought, what better way to get the fire ramped up and burn off all the lighter fluid:
Now back to the pig. You didn’t think we were going to put a pig right on top of 100 pounds of ripping hot charcoal did you? Well, yes we did, but not until we insulated the pig with some aluminum foil:
Make sure that there are no holes in the foil whatsoever. The pig has some pretty sharp nails and easily poke holes in the foil which that will be like having a blow torch where the hole is.
Now on to making the pig pretty for the grill. A little pillow to prop the head up and some foil around the ears to make them stick out:
Now time to season and rub the pig. First, a heavy coat of coarse salt:
Make sure to get the sides
Now hit it with your favorite rub. The one I’m using here has no salt in it, so I salted first
Josephine on the grill:
Here I am next to the grill and want to show you one of two problems we had with this pig roast:
When we positioned the charcoal in the grill, we did so with the expectation that the pig would be closer to the left side of the grill. But after it was skinned, the pig wound up more to the right, so the 60 pounds of charcoal is under the pigs snout and the forty is under the stomach.
The second problem was that we used the same size can in the cavity of the pig that was only 66% the size of the pig Skip showed me how to skin. I’ll show you why that was a problem in a few pictures. Neither of these problems were anything to worry about based on the results, but I wanted to address them.
Before we set the grill grate down, we dropped in about 20 pounds of hickory and peach wood and after we closed the lid, we got a nice amount of smoke:
We also smoked some beans which were simply Bush’s Baked Beans (not the grilled ones because we did that ourselves). Nothing all that complicated. 7 pounds of beans per tray, a cup of brown sugar, half cup minced garlic, quarter cup of the rub (basically what I had left from slathering the pig) quarter cup of honey all mixed together and then one inch squares of bacon positioned around the top:
Now back to the pig, 2.5 hours later, here’s Josephine with a lovely tan:
Without the skin, I worried that the meat would dry out more quickly than with, so I hit it with a spritz of apple juice before adding more smoke wood:
At the four hour mark, it was time to make up some BBQ sauce. All I did was take most of a gallon of Sweet Baby Ray’s, add some brown sugar, garlic, honey and beer (oh and I changed into my Luau garb since that was the theme of the party, and yes that’s the same Hawaiian shirt from last year. I only own one.), and you can see the beans are in the back and have been on for about an hour:
At the four hour mark, we decided to hit the pig with some sauce:
Wait, what is that in the above picture below the mop on the right? It was the other problem we had:
It would seem we need a little smaller can for a pig this size. Those cans work well for a 120 pound pig, but an 80 pound pig is not big enough. It’s not great for presentation, but I’m not putting a dress and make up on this pig, I’m going to eat it.
We added more smoke wood as well.
Here we are 5 hours in:
We added more smoke wood. Not because the meat will take any more smoke on at this time, but the sauce on the outside will absorb it.
At the six hour mark, we were getting close to our target temp of 160 in the shoulder:
We moved the beans over on top of the heat to get them going at the six hour mark:
The hole on the side of the pig had opened even farther:
Here we are at seven hours:
And the temp was sitting at 159. My goal was 160, but time to pull it and let it rest. It will continue to cook while it rests:
Josephine chillaxin’:
Thanks Emily for letting me borrow the glasses and for taking a bunch of pictures:
That handsome fella behind her is the one and only Joe Bonwich of the St. Louis Post Dispatch. Seeing how he is a restaurant critic, he doesn’t like for people to know what he looks like so he doesn’t get preferential treatment and can make an honest assessment of an eating establishment, but he allowed me to use that pic plus one more of him straight on so you can really get an idea of what the man looks like. See below for a GrillinFools exclusive:
After a good 45 minutes of resting, time to don the gloves and get to work on pulling the pork from the pig:
Time to get to work:
Examining the pork and a little quality control or pitmaster’s prerogative, take your pick:
Enjoy a sample, Carol
And I have to take care of the whomever is behind the camera while we work:
A close up of the beans:
But what about the pig? Was it any good? Was it better than last year? This picture sort of sums it up:
Why is that picture significant? Because it shows how juicy the meat is, the slight smoke ring around the outer edge, along with the rub and sauce on the outside that all contribute to the flavor. That and all of these people were extremely happy with the pig:
They were so happy, this was all that was left, forgive the lousy picture. It was from my phone:
So, when all is said and done, are there any things we could do to improve the process?
1) We would make sure the pig is positioned properly over the coals. The meat in the rear haunches was not as tender as the shoulders. It was delicious and wasn’t tough, it just wasn’t pulled pork tender.
2) We will not use cans that big or get a bigger pig. Either way, I don’t want the side splitting open again. It didn’t impact the flavor, but it did impact presentation.
All in all, it was a highly successful pig roast.
Skinning the pig added 40 minutes of prep to the process, but it shortened the cooking time by about an hour and it made the pig so much better than the one we did last year.
You can follow the Grillin Fools on Facebook and post your own grillin pictures or on Twitter @GrillinFool.
