dealm9
is one Smokin' Farker
- Joined
- Apr 22, 2011
- Location
- Clevelan...
I just finished my second UDS and I made it Cleveland Browns themed. I figured if the Browns are not going to do anything good with the orange, white, and brown, then I guess I have to. Trust me the 'que I make in it will be of much better quality than the quality of the Cleveland Browns' play. Anyway I just wanted to post some pron to say thank you to all the help I got and go over what I learned from my first UDS and what I did different this time around based on what I learned.
First thing I did differently was buy a closed top drum. For my first UDS I bought an open top which I could not get to fit my kettle lid. Unfortunately I learned of putting flat stock aluminum around the bent lip of the drum a little too late and decided to bend up the lip which made the lid fit but with horrible leaks. This is what the first one looked like with the horrific work on the lip
 It was never air tight even when I tried to install a gasket and sealant which never stayed on because it did not have the lip to rest on. So in order to forgo having to install aluminum and gasket, I bought a close top which my lid actually fit this time. Here it is.

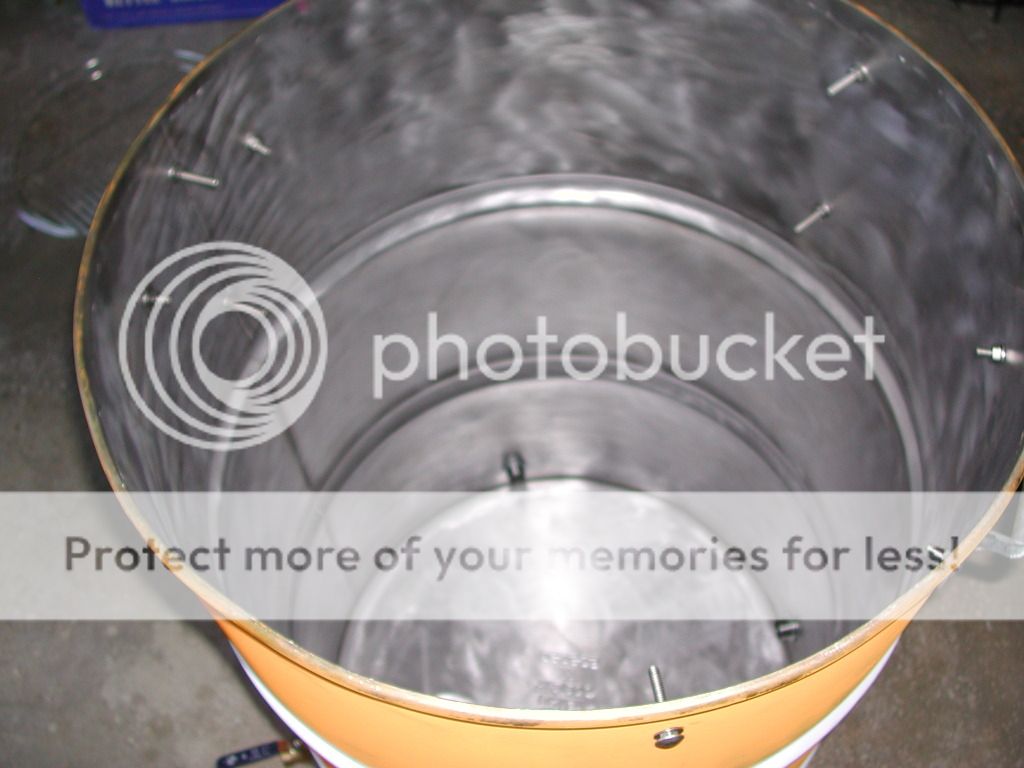
As many of you may know from a thread a posted earlier, I used a hammer and a chisel to cut the top off, which led to some nasty jagged edges on the inside of the drum


I ended up pounding it all down and using a little grinding tool to soften the sharp parts.
I then went on with the normal drilling and such. I did make some changes from my first drum.
1) Added handles:clap:
2) Added an extra intake so now I have four 1" holes
- I know it is normal to have 3 1" holes which I am sure is enough, but the fourth will help me with the brutal Cleveland winters and I felt that I could have used more air flow during some of my cooks with my first drum.
- With that extra intake I also added an extra ball valve. I did this mostly because I had an extra lying around and decided to put it to some use. I am hoping that this will help dial in higher temps better.
3) I changed the length of my carriage bolts for my grates from 1.5 to 1".
- On my old UDS I saw somewhere to use 1.5" bolts and boy was it a pain. I had to leave one of the top bolts semi-loose so that I could loosen it and pull the carriage bolt half way out so I could put in the bottom grate because it could not fit under the bolts with all 3 all the way out.
4) I added conduit locknuts to the inside and outside of the pipe nipples to lock them in place. I used to use magnets on my first drum then decided to finally upgrade to pipe nipples. However I never got anything to lock them in place so when I took the caps off, the nipples would come out too:frusty:. I bought some JB weld but never got around to putting it on because it was while I was only home for short periods of time while coming and going from school. I stole the conduit locknuts method from Norcoredneck in this thread and now they stay in great.
5) Added a deflector
- For this I just used a really old and disgusting pizza pan that had holes already in it. I just sit it right on top of the charcoal basket which I have read evens out the temp and makes it more indirect. I am in the middle of my seasoning burn and the temp difference from the center of the rack and the outside of the rack for both the bottom and top rack has not exceeded 20 degrees and is often within ten so I am very happy already. The bigger reason I did it though was with my first drum, if I did not put a drip pan on the lower, whatever I was cooking burned on the bottom and I had a couple of pork butts whose bottoms stuck to the grate:tsk:. I am hoping this will solve that problem and allow me to utilize both greats without having to worry about anything burning.
6) Lowered the bottom grate and raised the top grate.
- I used the specs from Norcoredneck's UDS thread this time and now the distance between my two greats is much larger, giving me more option of what to cook on the bottom rack. On my old drum, I do not remember what specs I used but they were not good as there was about a 4 inch difference between the racks so I could not do much with the lower rack.
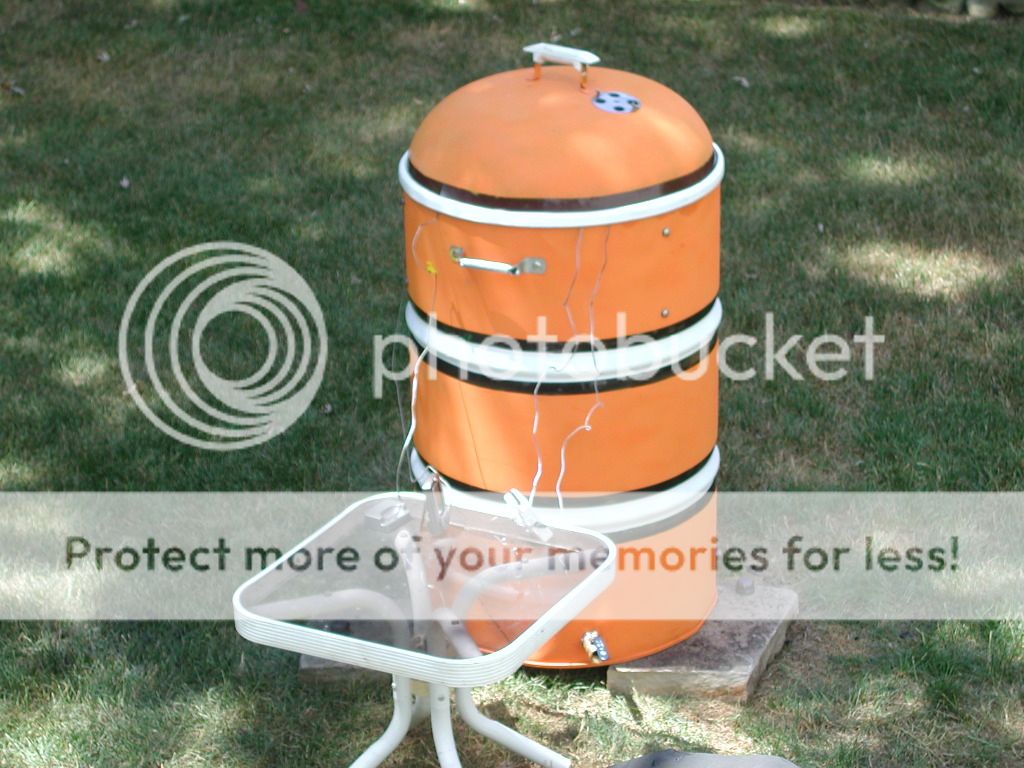
Ok enough talking and more pron. Like I said I wanted it to be Cleveland Browns themed so I taped it off and painted each color individually. I found the high heat orange at nappa valley auto parts and had to get more and went to oreilly autoparts where it was cheaper. I got the white at home depot. It was just Rustoleum's High Heat grill paint. The brown was a much tougher find, and I ended up having to order it off amazon. It literally just arrived at my doorstep as I began this thread so the only thing left for my build is to apply the brown paint. However, what needs to be brown is black right now and from a distance one just assumes it is brown. The lid was originally brown so that already looks finished. The taping took a long time to try and get the stripes to look even all the wzy around.

Here it is with the lid, fully assembled, and with the guts. The deflector is what is sitting op top of the charcoal basket

Oiled and the lit coals were just added here and the seasoning is just beginning
As it stands right now, I am one hour into the seasoning. The center of the lower rack is 262 degrees F. The outside is 264. I am very happy about that. For the top rack the outside is 268 and the center is 228. This large diference just occurred during my post. However, I believe the difference is because the 3 probes that are measuring the higher temps are sitting directly on the grates as I ran out of potatoes or anything else for them to rest on. The lower temp of 228 is from the Maverick clip on bbq probe. I am hoping the evenness of the bottom rack is more in line with what I can expect from the deflector. I probably screwed it up by doing that but I searched my house for something to put them on and found nothing since we ran out of groceries because we are about to leave for vacation.
Thanks for reading and any comments/critiques/suggestions are appreciated. Also if you have any questions ask and please learn from my mistakes!
First thing I did differently was buy a closed top drum. For my first UDS I bought an open top which I could not get to fit my kettle lid. Unfortunately I learned of putting flat stock aluminum around the bent lip of the drum a little too late and decided to bend up the lip which made the lid fit but with horrible leaks. This is what the first one looked like with the horrific work on the lip
As many of you may know from a thread a posted earlier, I used a hammer and a chisel to cut the top off, which led to some nasty jagged edges on the inside of the drum
I ended up pounding it all down and using a little grinding tool to soften the sharp parts.
I then went on with the normal drilling and such. I did make some changes from my first drum.
1) Added handles:clap:
2) Added an extra intake so now I have four 1" holes
- I know it is normal to have 3 1" holes which I am sure is enough, but the fourth will help me with the brutal Cleveland winters and I felt that I could have used more air flow during some of my cooks with my first drum.
- With that extra intake I also added an extra ball valve. I did this mostly because I had an extra lying around and decided to put it to some use. I am hoping that this will help dial in higher temps better.
3) I changed the length of my carriage bolts for my grates from 1.5 to 1".
- On my old UDS I saw somewhere to use 1.5" bolts and boy was it a pain. I had to leave one of the top bolts semi-loose so that I could loosen it and pull the carriage bolt half way out so I could put in the bottom grate because it could not fit under the bolts with all 3 all the way out.
4) I added conduit locknuts to the inside and outside of the pipe nipples to lock them in place. I used to use magnets on my first drum then decided to finally upgrade to pipe nipples. However I never got anything to lock them in place so when I took the caps off, the nipples would come out too:frusty:. I bought some JB weld but never got around to putting it on because it was while I was only home for short periods of time while coming and going from school. I stole the conduit locknuts method from Norcoredneck in this thread and now they stay in great.
5) Added a deflector
- For this I just used a really old and disgusting pizza pan that had holes already in it. I just sit it right on top of the charcoal basket which I have read evens out the temp and makes it more indirect. I am in the middle of my seasoning burn and the temp difference from the center of the rack and the outside of the rack for both the bottom and top rack has not exceeded 20 degrees and is often within ten so I am very happy already. The bigger reason I did it though was with my first drum, if I did not put a drip pan on the lower, whatever I was cooking burned on the bottom and I had a couple of pork butts whose bottoms stuck to the grate:tsk:. I am hoping this will solve that problem and allow me to utilize both greats without having to worry about anything burning.
6) Lowered the bottom grate and raised the top grate.
- I used the specs from Norcoredneck's UDS thread this time and now the distance between my two greats is much larger, giving me more option of what to cook on the bottom rack. On my old drum, I do not remember what specs I used but they were not good as there was about a 4 inch difference between the racks so I could not do much with the lower rack.
Ok enough talking and more pron. Like I said I wanted it to be Cleveland Browns themed so I taped it off and painted each color individually. I found the high heat orange at nappa valley auto parts and had to get more and went to oreilly autoparts where it was cheaper. I got the white at home depot. It was just Rustoleum's High Heat grill paint. The brown was a much tougher find, and I ended up having to order it off amazon. It literally just arrived at my doorstep as I began this thread so the only thing left for my build is to apply the brown paint. However, what needs to be brown is black right now and from a distance one just assumes it is brown. The lid was originally brown so that already looks finished. The taping took a long time to try and get the stripes to look even all the wzy around.
Here it is with the lid, fully assembled, and with the guts. The deflector is what is sitting op top of the charcoal basket
Oiled and the lit coals were just added here and the seasoning is just beginning
As it stands right now, I am one hour into the seasoning. The center of the lower rack is 262 degrees F. The outside is 264. I am very happy about that. For the top rack the outside is 268 and the center is 228. This large diference just occurred during my post. However, I believe the difference is because the 3 probes that are measuring the higher temps are sitting directly on the grates as I ran out of potatoes or anything else for them to rest on. The lower temp of 228 is from the Maverick clip on bbq probe. I am hoping the evenness of the bottom rack is more in line with what I can expect from the deflector. I probably screwed it up by doing that but I searched my house for something to put them on and found nothing since we ran out of groceries because we are about to leave for vacation.
Thanks for reading and any comments/critiques/suggestions are appreciated. Also if you have any questions ask and please learn from my mistakes!