Kaptain Kadian
is Blowin Smoke!
I decided to start a new thread for the build I just finished for a t shaped smoker I made for my cousin. It was a surprise I did for his birthday. He thought he was helping me move something, but instead got to move a new smoker.
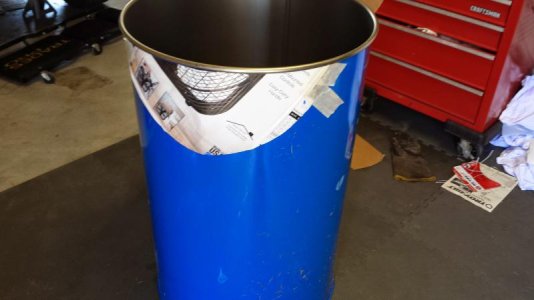
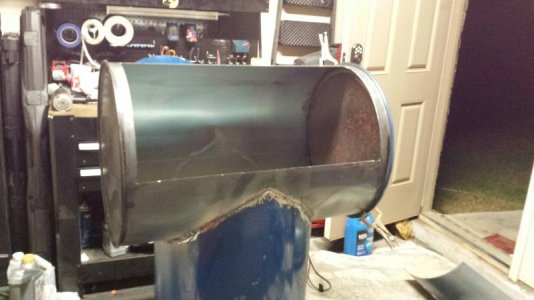
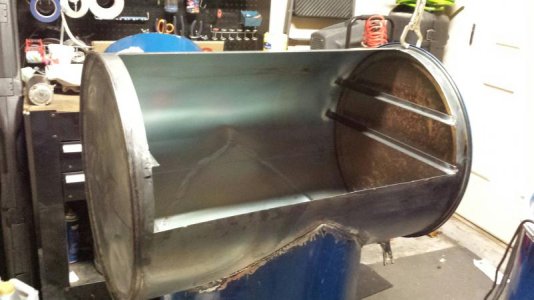
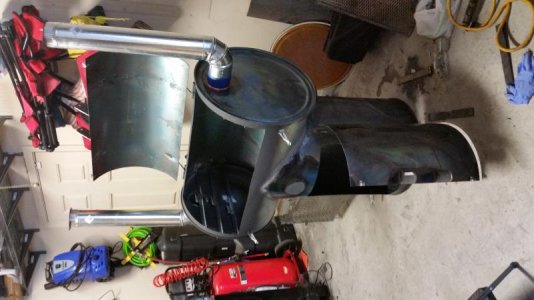
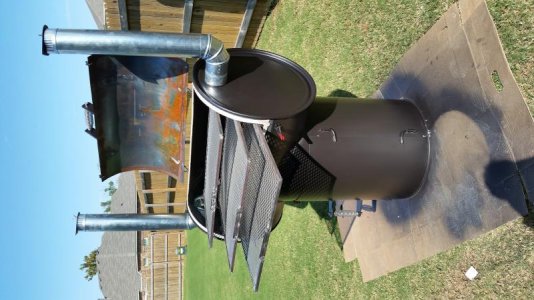
I started with 3 open ended 55 gallon barrels I got for$10 each. I took my propane torch to them to burn the paint off of them. I took the barrel for the bottom barrel and tried to make some templates for cutting it based on wanting it to go about 1/3 of the way up the top barrel. I failed miserably in that attempt. I figured out that the cut has to come to a point in the middle and the lid ring has to be cut off for the top barrel to sit close enough to weld them together. I ended up just free handing it with my grinder and cut off wheel. It works great for cutting the barrels. I did all the work on it with a small mig welder and grinders. It took quite a while to fill in the gaps between the 2 barrels. I burned through a lot of welding wire.
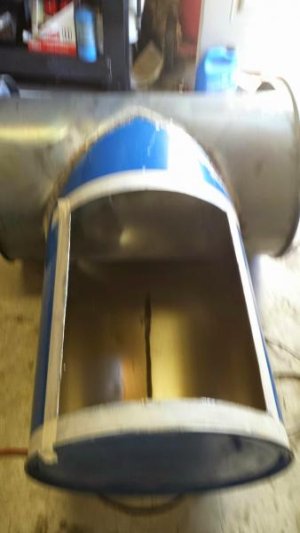
Once I got the 2 barrels attached, I moved onto cutting the doors. I used masking tape to mark off the door I wanted. I wanted to make an opening 2 inches smaller than the door I was going to make out of the 3rd barrel. So, I used 2 inch masking tape and made the outline of the opening. I found the very top of the top barrel and measured down 1/4 of the way and cut that piece out. I made an opening in the bottom barrel the same way. I went 2 inches up from the bottom and made it 18 inches around and around 22 inches tall. I then took the sections I cut out and layer them onto the donor barrel and made then 2 inches larger all the way around and cut them with my grinder. I attached them with hinges I made out of bending some 5/16 round bar I bent to 90 degrees in my vice and used 1/2 tubing to slide them in. I also welded a piece of the tubing just behind the hinges for a lid stop on the top barrel
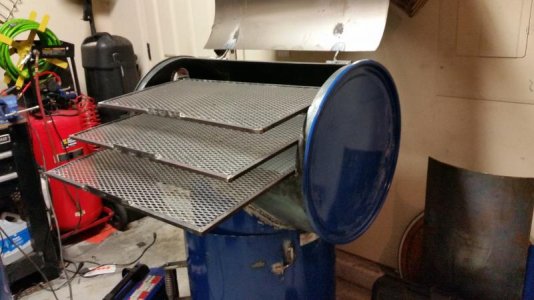
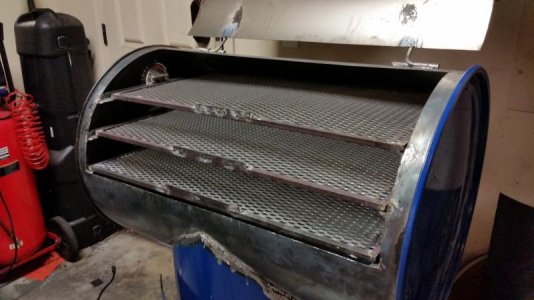
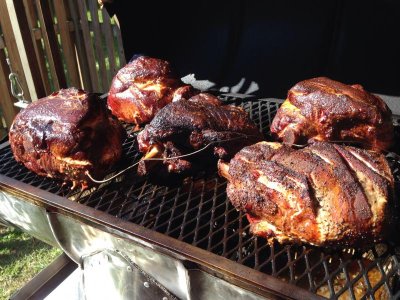
I then welded in some 1/2 inch angle iron in for the slides for the racks. I also welded in some 2 inch tabs on top of the slides so I could pull the racks almost all the way out and they will hinge on the tabs and not fall out. I used a triangle welding magnet I had to space the 3 racks. They are 3.5 inches apart. He is a big rib guy, so I was going for max cooking area, and he can pull the middle rack out and still cook briskets and pork butts or pull the top 2 racks out and do a turkey.
I made the grates out of expanded metal grating and framed them in with 1/4 inch angle iron. I made the frames first and Ghent cut the grating to fit, so I would be sure that they would fit in the smoker. Pretty easy with the grinder. I then spot welded the grating to the under side of the angle iron. I also cut a piece of the angle iron and welded it to the top of the grate for a tab to help pull them out.
I ordered the 6 inch spring handles off of Amazon and the toggle clamps off of eBay. Both where pretty cheap. I had some plate steel from another project I did and cut it into 2 x 4 inch pieces and welded them onto the doors. I attached the spring handles with some full thread rod and lock nuts. I used my pop rivet gun to attach the toggle clamps.
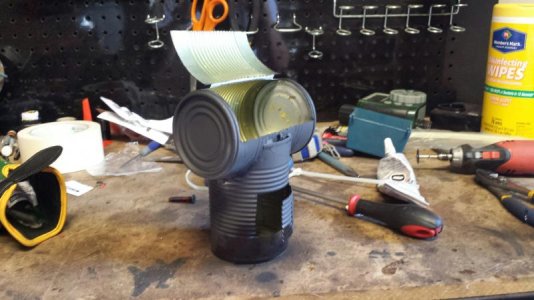
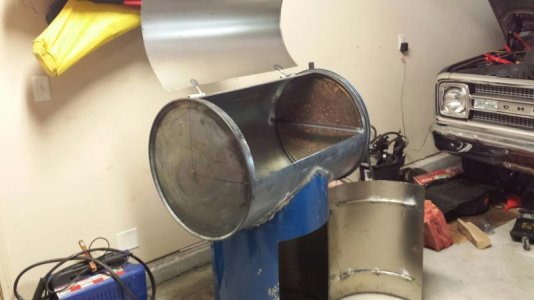
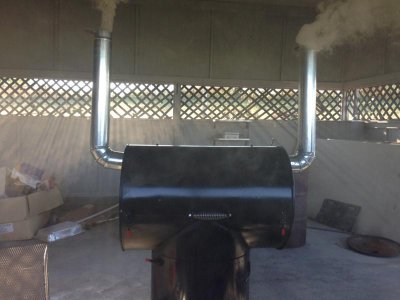
I found some 4 inch galvanized duct work that I used for the smoke stacks. I bought some 4 inch duct collars from Lowe's and used those to attach the smoke stacks to the barrel. I tried using a 4 in hole saw, but kept breaking the drill bits off, so I used my dremel tool with a cut off wheel and cleaned it up with a grinding stone. I cut out some tear drop shaped pieces and attached them to the top of the smoke stacks to use as dampers.
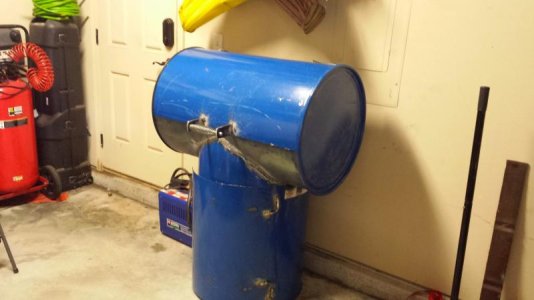
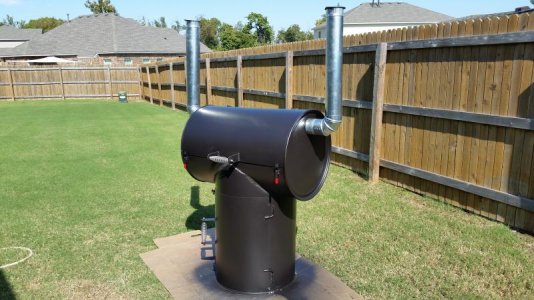
I got a quart jar of rustoleum high heat paint and sprayed it with a $10 gravity fed spray gun I got from harbor freight. Worked amazingly well. I didn't have to thin the paint or anything. Just dumped it in there a blasted it.
I bought some flat rope gasket from a local fireplace store and attached it with a tube of silicone stuff they had. Super pleased with how well it worked. The top barrel is air right around the door once you clamp it down with the toggle clamps and the bottom was as well. I wanted the bottom to be as tight fitting as possible, because he will be running a bbq guru with it. I wanted it to be where the guru controlled all the air getting to the fire. Also saved a lot of time having to install air intakes. The gasket also made up for a lot of my shortcomings as a fabricator. I am a pharmacist by trade and have had no welding instructions. I have just picked up things as I have gone along.
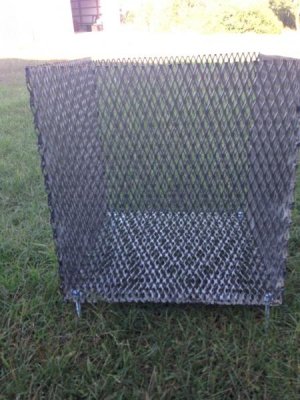
I built a charcoal basket out of the same grating as I used for the racks. I wanted to make it as big as I could, so I got out the old calculamatron and figured up that around a 15 x 15 square was about as big as I could get to fit comfortably in the barrel. I wanted it 3 inches off the bottom of the barrel and still be able to add charcoal or wood to the top of it when needed. I think it ended up about 15x15x16.
I used my step bit and drilled a bunch of holes in the top barrel to let the heat and smoke in. I was a little concerned about the bottom of the meat getting burned and considered putting in a heat deflector. I ended up not putting one in, and he said the meat was fine. I can always add one later if needed.
I think that is roughly it. Any questions, comments, whatever, let me know. Thanks for looking.
I started with 3 open ended 55 gallon barrels I got for$10 each. I took my propane torch to them to burn the paint off of them. I took the barrel for the bottom barrel and tried to make some templates for cutting it based on wanting it to go about 1/3 of the way up the top barrel. I failed miserably in that attempt. I figured out that the cut has to come to a point in the middle and the lid ring has to be cut off for the top barrel to sit close enough to weld them together. I ended up just free handing it with my grinder and cut off wheel. It works great for cutting the barrels. I did all the work on it with a small mig welder and grinders. It took quite a while to fill in the gaps between the 2 barrels. I burned through a lot of welding wire.
Once I got the 2 barrels attached, I moved onto cutting the doors. I used masking tape to mark off the door I wanted. I wanted to make an opening 2 inches smaller than the door I was going to make out of the 3rd barrel. So, I used 2 inch masking tape and made the outline of the opening. I found the very top of the top barrel and measured down 1/4 of the way and cut that piece out. I made an opening in the bottom barrel the same way. I went 2 inches up from the bottom and made it 18 inches around and around 22 inches tall. I then took the sections I cut out and layer them onto the donor barrel and made then 2 inches larger all the way around and cut them with my grinder. I attached them with hinges I made out of bending some 5/16 round bar I bent to 90 degrees in my vice and used 1/2 tubing to slide them in. I also welded a piece of the tubing just behind the hinges for a lid stop on the top barrel
I then welded in some 1/2 inch angle iron in for the slides for the racks. I also welded in some 2 inch tabs on top of the slides so I could pull the racks almost all the way out and they will hinge on the tabs and not fall out. I used a triangle welding magnet I had to space the 3 racks. They are 3.5 inches apart. He is a big rib guy, so I was going for max cooking area, and he can pull the middle rack out and still cook briskets and pork butts or pull the top 2 racks out and do a turkey.
I made the grates out of expanded metal grating and framed them in with 1/4 inch angle iron. I made the frames first and Ghent cut the grating to fit, so I would be sure that they would fit in the smoker. Pretty easy with the grinder. I then spot welded the grating to the under side of the angle iron. I also cut a piece of the angle iron and welded it to the top of the grate for a tab to help pull them out.
I ordered the 6 inch spring handles off of Amazon and the toggle clamps off of eBay. Both where pretty cheap. I had some plate steel from another project I did and cut it into 2 x 4 inch pieces and welded them onto the doors. I attached the spring handles with some full thread rod and lock nuts. I used my pop rivet gun to attach the toggle clamps.
I found some 4 inch galvanized duct work that I used for the smoke stacks. I bought some 4 inch duct collars from Lowe's and used those to attach the smoke stacks to the barrel. I tried using a 4 in hole saw, but kept breaking the drill bits off, so I used my dremel tool with a cut off wheel and cleaned it up with a grinding stone. I cut out some tear drop shaped pieces and attached them to the top of the smoke stacks to use as dampers.
I got a quart jar of rustoleum high heat paint and sprayed it with a $10 gravity fed spray gun I got from harbor freight. Worked amazingly well. I didn't have to thin the paint or anything. Just dumped it in there a blasted it.
I bought some flat rope gasket from a local fireplace store and attached it with a tube of silicone stuff they had. Super pleased with how well it worked. The top barrel is air right around the door once you clamp it down with the toggle clamps and the bottom was as well. I wanted the bottom to be as tight fitting as possible, because he will be running a bbq guru with it. I wanted it to be where the guru controlled all the air getting to the fire. Also saved a lot of time having to install air intakes. The gasket also made up for a lot of my shortcomings as a fabricator. I am a pharmacist by trade and have had no welding instructions. I have just picked up things as I have gone along.
I built a charcoal basket out of the same grating as I used for the racks. I wanted to make it as big as I could, so I got out the old calculamatron and figured up that around a 15 x 15 square was about as big as I could get to fit comfortably in the barrel. I wanted it 3 inches off the bottom of the barrel and still be able to add charcoal or wood to the top of it when needed. I think it ended up about 15x15x16.
I used my step bit and drilled a bunch of holes in the top barrel to let the heat and smoke in. I was a little concerned about the bottom of the meat getting burned and considered putting in a heat deflector. I ended up not putting one in, and he said the meat was fine. I can always add one later if needed.
I think that is roughly it. Any questions, comments, whatever, let me know. Thanks for looking.