My Chargriller Resotoration & Mod Project.

chris1360

Knows what a fatty is.
Joined
Jun 15, 2014
Messages
119
Reaction score
77
Points
0
Location
Rex, Georgia
About 5 years ago I upgraded my el-cheapo Wally World 22 inch kettle to this Chargriller. At the time I thought it would be a good grill and offset smoker combo. After trying to mod the crap out of it, and many long nights chasing temperature swings, I gave up on trying to smoke on the Chargriller. Soon after, I built a UDS and a mini UDS, so the Chargriller was demoted to high heat grilling only.

After 5 years this things is pretty beat up, rusted, and needs a face lift, badly. I really wanted to go buy a 26 inch Weber, but that cost money, and I am cheap. So the Chargriller got some love, and a few modifications to make it suit my grilling needs. Here is what I did:

Here is my worn out Chargriller after 5 years of abuse:


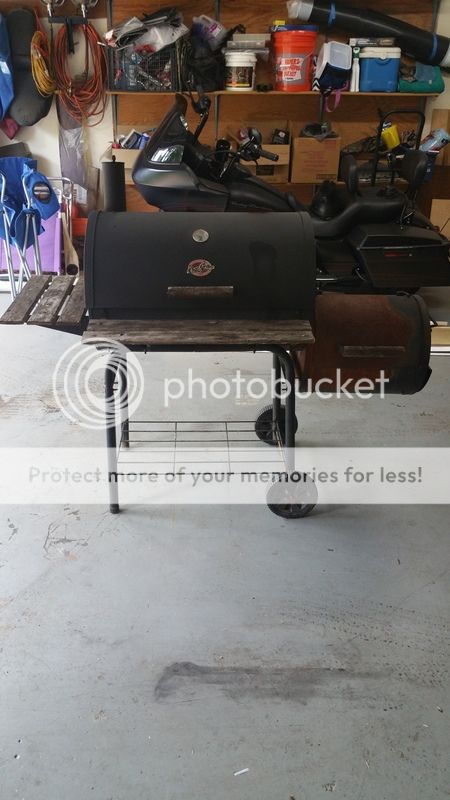
As you can see, the weather did not treat this thing very well, and the paint apparently was not as heat resistant as they claimed. One of my main gripes about the Chargriller was how terrible the ash catcher and charcoal rack was. I couldn’t bank the coals on the side very well because the coals would fall into the fire box, and ash went everywhere. I tried a few mods with some old scrap metal with ‘meh’ results. You can see here that it’s an absolute mess:


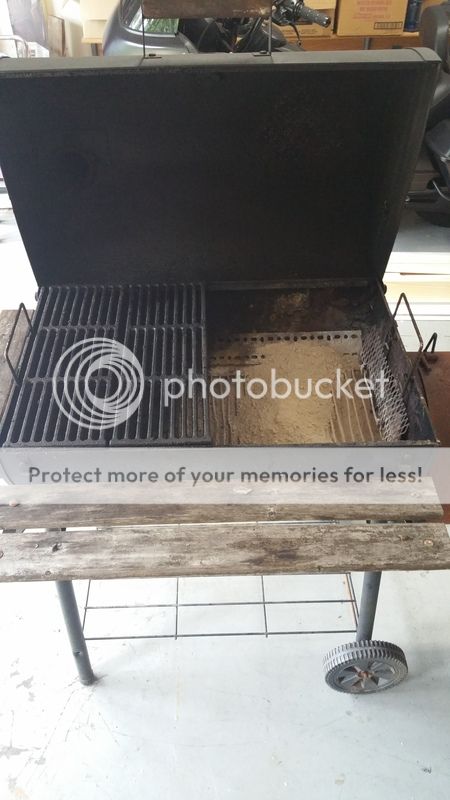
I began by stripping the whole grill down in order to start the mods and rust removal:
 
My first mod was to get rid of that crappy thermometer mounted to the lid, which was over 100 degrees off, in case anyone is wondering. I used scrap sheet metal I had laying around to fill in the hole. I use a digital Maverick now, so having a thermometer in the lid was unnecessary for me. ***Warning to any of you pro welders: I own a cheapo Northern Tool 110v flux core welder. I have never been trained on how to weld, and taught myself through trial and error. I have never been a professional welder, and I have never played one on TV. My welds look like total garbage and I am okay with that…. The end goal was met, which is joining two pieces of metal together.
Back to the project with the welds all ground down:


Next order of business was to mod the chimney, which on this model exited on the top left side of the grill lid. I had a lot of issues with cold spots on the left side of the grill because the chimney was too high, and in the wrong place. The two corners on the left side were sometimes 50-75 degrees cooler. Since I decided to scrap the firebox, I cut out a section of the ash pan, which had the perfect radius I needed:


And then welded it to cover the old chimney hole:


Now I had to make a new chimney. I wanted the new one to exit on the left side still, but down at the grate level to help even the temps out. I did not have any scrap tubing, so I ran by Auto Zone and grabbed these two short pipe sections. They are actually meant for car mufflers and exhaust repair, but they will work just fine for my purpose. And they were only 1 dollar a piece!


Remember my earlier claim about not being a welder…. This is where it shows! I cut two ‘kinda’ 45 degree angles on the small pipes. I say ‘kinda’ because it’s hard as crap to cut 3 inch pipes accurately with a small angle grinder. Anyways, got them all welded up, with about 2000 feet of flux core wire to fill in all the gaps. Just kidding, it was a lot of gap filling, but I don’t know how much wire I used. I reused the top of the old chimney because I liked the sliding rain guard:
 
With the chimney all finished up, it was time to move on to the air intake control. The little daisy wheel on the old firebox will be sufficient enough for high heat grilling. So I welded it in place on the lower portion of the grill body, and filled in the old bolt holes:


If you have never seen one of these Chargrillers, they are completely bolt together, and have about a million bolt holes. I went over the entire grill body and filled in the bolt holes. The way I did it was grind some of the old bolts down to shiny metal, hold them into the bolt holes, and used them as filler metal while welding them in place. Then I just ground down the bolt head and it worked pretty well. No more bolt holes:


Another modification I wanted to try was to see if I could get the lid to seal better. I used some scrap 1/8 by 1 inch flat bar, and welded it around the perimeter of the lid, so the lid would now have something to seat against the bottom of the grill. It worked better than having nothing, and I might add some stove gasket at a later time. For now it is good enough:


The next modification I wanted to make, was to improve the ash catcher and charcoal grate. The original design was pretty good, but it was just too flimsy and deformed over time with the heat. So I ran to Lowes and grabbed about 20 bucks worth of concrete rebar. I think the pictures will explain it better than I can, but my goal was to have a sturdy charcoal grate for indirect cooking, still catch the ash, all using the original grate hanging system which allowed for height adjustments.
Here is the frame of the charcoal grate:


Here it is welded to the ash catcher:


That turned out really sturdy, and it works a lot better than it did before. Now I needed a way to hold the charcoal in place on the side for indirect 2 zone grilling. Used some more rebar and welded up a basic box that would fit the charcoal grate:


I was not done with the grill, but I was itching to try out the new charcoal basket. Worked amazingly well:


Couldn’t waste a good bed of coals:


I had a little extra rebar, so I decided to make a deeper charcoal basket in case I ever want to do a quick smoke on the grill, like say MOINK balls or some ABT’s. I still need to weld in the side rods, but you get the basic idea. I will update later when I finish the basket:

 
That was pretty much all the mods for the grill body, so now for some fresh paint after a few hours of rust removal with a flap wheel on the grinder. Took a total of 4 coats, which equaled to about 4 cans of Rustoleum High Heat Ultra paint. It is the same stuff I used on my UDS which worked out great and has held up for 2 years:


With all that welding behind me I figured it was time to do something I actually enjoy and can do well… woodworking! I made a new shelf for the front of the grill with some old scrap 2x6’s. Jointed, planned, and edge joined with glue and a ton of clamps. After some sanding and paint it turned out good. I used some hammered finish paint to give it a little texture:


Next I decided to make a drawer that could store some of my grill accessories. Pretty simple construction, ¾ inch birch ply scraps that I had left over from another project, with pocket holes and glue joints. I used the old handle from the fire box, and the old shelf supports to complete the shelf and drawer. A little more hammered finish paint, some wax on the drawer runners, and this grill is almost done:


Last final touch was to reuse the old hooks from the original grill to hang some accessories from the shelf. You will also notice the shelf is slightly angled down. I did that on purpose to keep the shelf from holding water when it rains:


I am really happy with the way it turned out. It is much more functional now, matches my UDS, and saved me from buying a new grill for a while. I had a lot of scrap stuff around the house, but the total cost for rebar, paint, pipe, was less than 40 bucks. Thanks for following along with my project. I will update with pictures when I finish the other charcoal basket this week, and see how it works. Let me know if there are any questions, I will be glad to answer them.
 
dhMeAzK.gif
 
Fun project, nice job.

My only concern in the wooden drawer, keep an eye on it...it may catch fire over time.
 
Fun project, nice job.

My only concern in the wooden drawer, keep an eye on it...it may catch fire over time.

I thought the same thing too, but it has a lot of clearance. I am going to watch it and see what happens. It it does go up in flames, I'm not out anything but some scraps.
 
very cool ! thanks for taking the time to post !
 
Fun project, nice job.

My only concern in the wooden drawer, keep an eye on it...it may catch fire over time.

I thought the same thing too, but it has a lot of clearance. I am going to watch it and see what happens. It it does go up in flames, I'm not out anything but some scraps.
 
Use it up, wear it out, make it do, or do without!

Way to show that old girl some love!
 
Many thanks for all the kind words. I am glad I was able to share my project with yall.
 
Back
Top