polishdon
Full Fledged Farker
Here's my version of the "frankenweber". After doing a bunch of online research and seeing how other people have made these I borrowed the ideas
I liked, made a few tweeks and here's what I ended up with.
The goal of this project is to make a wood burning pizza cooker that will cook pizzas at a high temp using materials I had lying around and as
little fabrication as possible. Sorry about the pics, damn blackberrys.
Any ideas or suggestions are welcome.
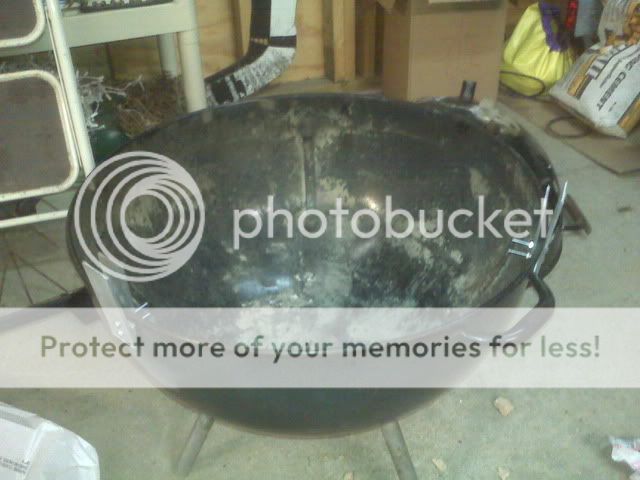
Start with 2 Weber 22.5" kettle bottoms. One will remain the bottom and hold the fire, the other will be used upside down as the top. The bottom
I decided to use was one I had already cut the legs down on to use as a fire pit. I think the shorter legs are a must when you take into account
the amount this weighs when done.
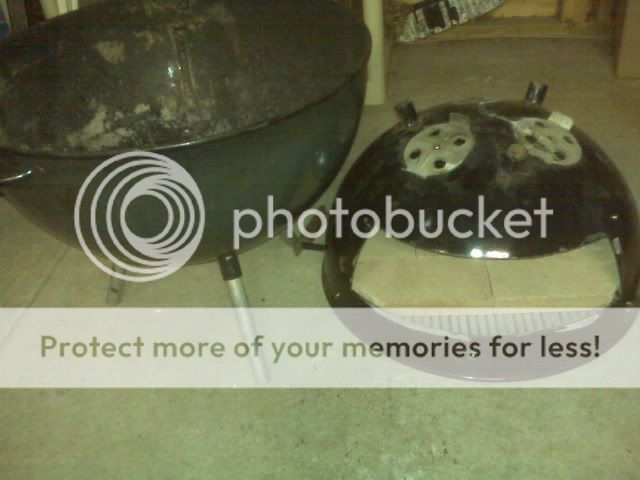
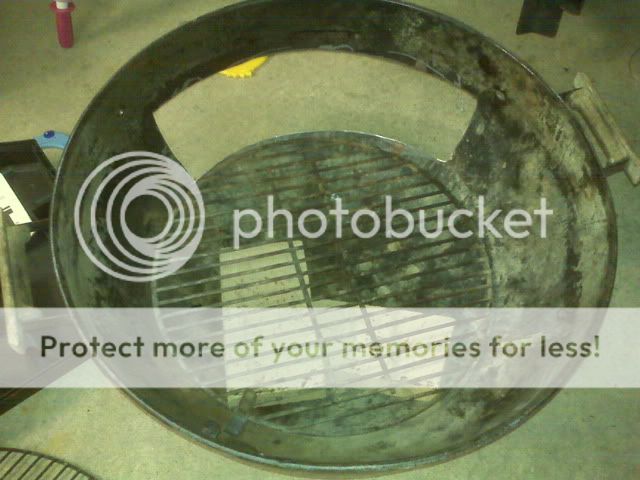
Decide which one you will use for the top and remove the grates. Remove one of the factory grate holders and mark out your opening hole, mine is
about 15 inches wide by 4.5 inches high. Cut the opening, I used a cutting wheel on a 4" grinder. Clean up the opening to remove any frays or
sharp corners.

Bend the factory pieces that hold the charcoal grate so that you can put the grate below them, instead of on top. This will become the roof of
the oven.
 .
.
Here's a shot of the charcoal grate in place as the roof. My first idea was to attach fire brick to the grate to flatten the top and provide
heat. Due to weight though I think I am going to replace the fire brick in the top with a 16" round pizza stone. Should fit right in.
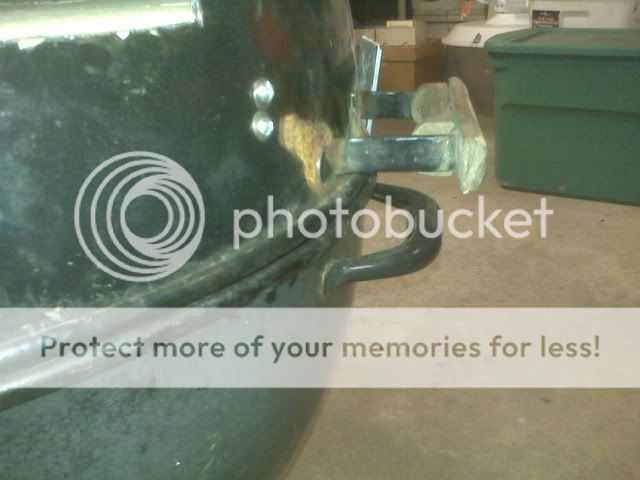
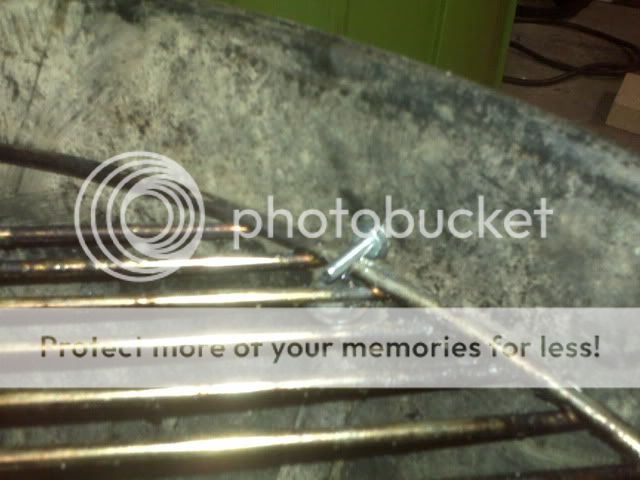
Add hardware around the kettle to hold the cooking grate in place from falling out as the factory mounts are now on top of the grate. I added
extra hardware around the kettle to account for the weight of the fire brick on the cooking grate.
With the grates in place it will look like this

THen I laid out the fire brick for the base on the cooking grate. Only had a chisel and hammer to work with so I was pretty happy with my
corners. Still have to cut 1 more brick for the front. THere will not be brick along the back edge, I am leaving that open to put a hot log.

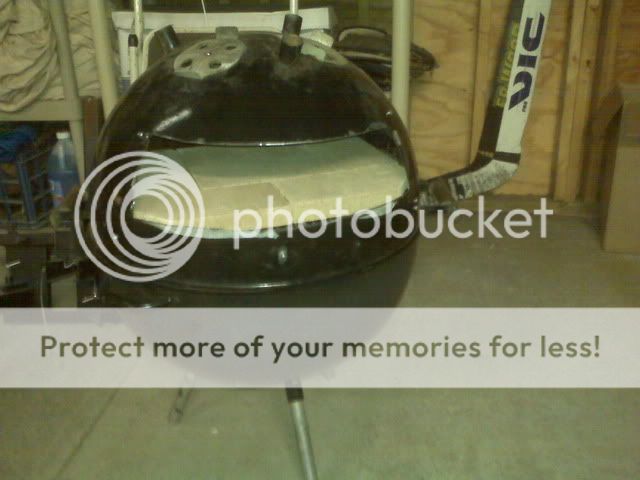
I reassembled everything and put the fire brick in. I like the way it's coming along. There's about 4.5 inches between the top of the fire brick
and the roof of the cooker. My hope is that I can get a nice hot fire going in the bottom, then put the top on and put a burning log right on the
fire brick to help heat the cooking area. After letting it all heat up I will push the log to the back on the grate and as it burns out it will
fall back into the bottom kettle.

Now I need to name it.
Things to finish:
Add cooking stone to top
Add some kind of support to make sure the top doesn't slip off the bottom while using. I'm thinking some steel around the inner and outer lip of the lower kettle.
Test cook
I liked, made a few tweeks and here's what I ended up with.
The goal of this project is to make a wood burning pizza cooker that will cook pizzas at a high temp using materials I had lying around and as
little fabrication as possible. Sorry about the pics, damn blackberrys.
Any ideas or suggestions are welcome.
Start with 2 Weber 22.5" kettle bottoms. One will remain the bottom and hold the fire, the other will be used upside down as the top. The bottom
I decided to use was one I had already cut the legs down on to use as a fire pit. I think the shorter legs are a must when you take into account
the amount this weighs when done.
Decide which one you will use for the top and remove the grates. Remove one of the factory grate holders and mark out your opening hole, mine is
about 15 inches wide by 4.5 inches high. Cut the opening, I used a cutting wheel on a 4" grinder. Clean up the opening to remove any frays or
sharp corners.
Bend the factory pieces that hold the charcoal grate so that you can put the grate below them, instead of on top. This will become the roof of
the oven.
Here's a shot of the charcoal grate in place as the roof. My first idea was to attach fire brick to the grate to flatten the top and provide
heat. Due to weight though I think I am going to replace the fire brick in the top with a 16" round pizza stone. Should fit right in.
Add hardware around the kettle to hold the cooking grate in place from falling out as the factory mounts are now on top of the grate. I added
extra hardware around the kettle to account for the weight of the fire brick on the cooking grate.
With the grates in place it will look like this
THen I laid out the fire brick for the base on the cooking grate. Only had a chisel and hammer to work with so I was pretty happy with my
corners. Still have to cut 1 more brick for the front. THere will not be brick along the back edge, I am leaving that open to put a hot log.
I reassembled everything and put the fire brick in. I like the way it's coming along. There's about 4.5 inches between the top of the fire brick
and the roof of the cooker. My hope is that I can get a nice hot fire going in the bottom, then put the top on and put a burning log right on the
fire brick to help heat the cooking area. After letting it all heat up I will push the log to the back on the grate and as it burns out it will
fall back into the bottom kettle.
Now I need to name it.
Things to finish:
Add cooking stone to top
Add some kind of support to make sure the top doesn't slip off the bottom while using. I'm thinking some steel around the inner and outer lip of the lower kettle.
Test cook

") I wonder if the weber can handle that kind of fire for extended periods?? I dunno?? Please post up the pics of your first effort..I am looking forward to how it works!
I wonder if the weber can handle that kind of fire for extended periods?? I dunno?? Please post up the pics of your first effort..I am looking forward to how it works!