Bpbolde
Well-known member
Years ago, I had a Brinkmann knockoff of the WSM. I really enjoyed it, but didn't know what I was doing. I've been doing the the best I can smoking in my gas and charcoal grills. I've been thinking about a dedicated smoker since buying our house four years ago. I've spent the past few months perusing the plethora of information on this forum and elsewhere and looking at hundreds of different smokers. I finally decided to order some steel and build one. A shout-out to Peeps for his smoker, Earl, being the primary inspiration for mine. Hopefully he'll forgive my plagiarism :grin:
 Sketch
The initial sketch. I made a couple small changes when I started drawing in CAD. I lowered the angle of the roof a bit and shortened the firebox height to 22" to make the chimney damper easier to reach. I made a sloped floor to facilitate draining and will put a gate valve there. Still deciding what to do for wheels/tires. Right now solid wheelbarrow tires on the heavy end and industrial swivel casters for the light end are winning.
 Cad
Cad
CAD drawing showing all the parts. I forgot the rim for the grill top and cut it out later this afternoon.
 tool paths
Imported the G-code to the plasma table computer, this is what the toolpaths look like when the parts are all nested to make the most efficient use of the sheet. The dashed lines are tool movement without a cut, the solid lines are where the torch is on and the fun is happening. I cut it (1/4" steel) at 65 amps and 90 inches per minute. We can hot rod the machine a bit and get more speed, but cut quality suffers. Total cutting time: 27 minutes.
 Steel
Steel
Two sheets of 5'x10'x1/4" steel and one 4'x8' sheet of #9x3/4" rolled flat angle iron. I forgot how heavy this stuff is, just over 500 pounds per sheet!
 before cut
On the table, ready to start burning some steel!
 Sheet 1
What's left of the first sheet, very little scrap. The cuts are really clean. The little slag that's on the back knocks right off with a putty knife. The water table does a great job keeping the smoke and molten metal under control and the parts come off nice and cool.
 Sheet 2
Sheet two off the table. It'll soon be back up there to cut out the grill rim I forgot.
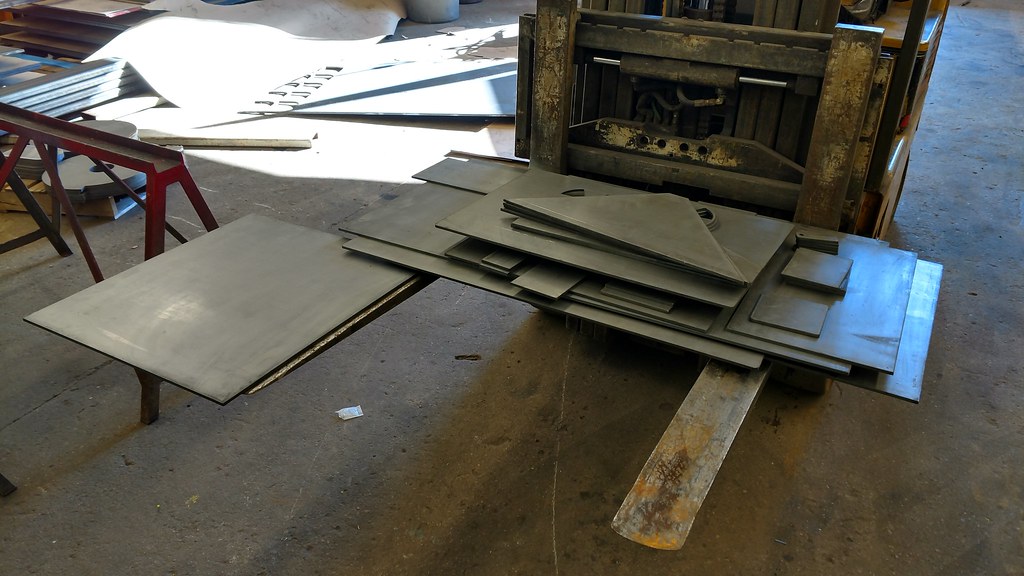 pile o parts
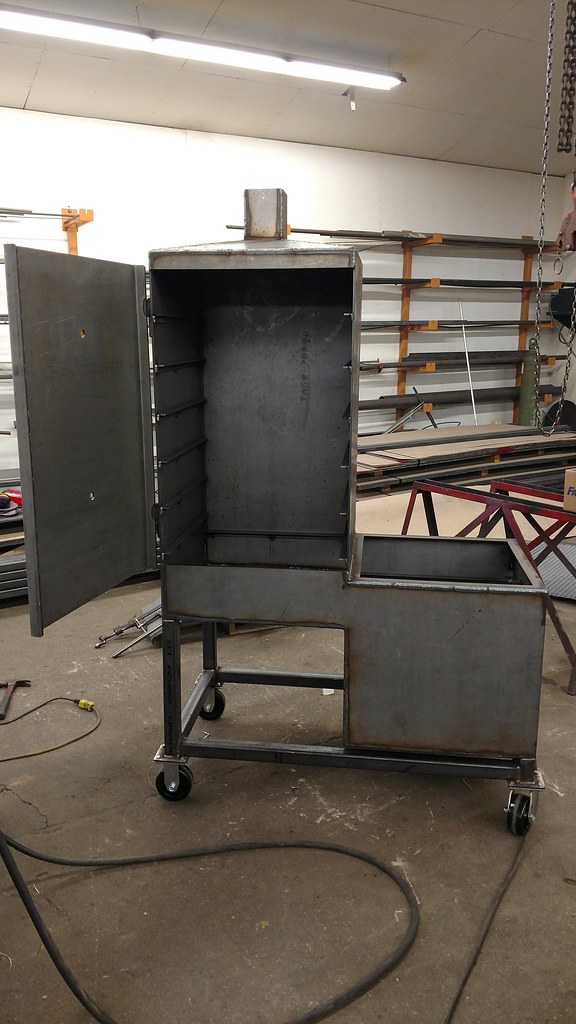
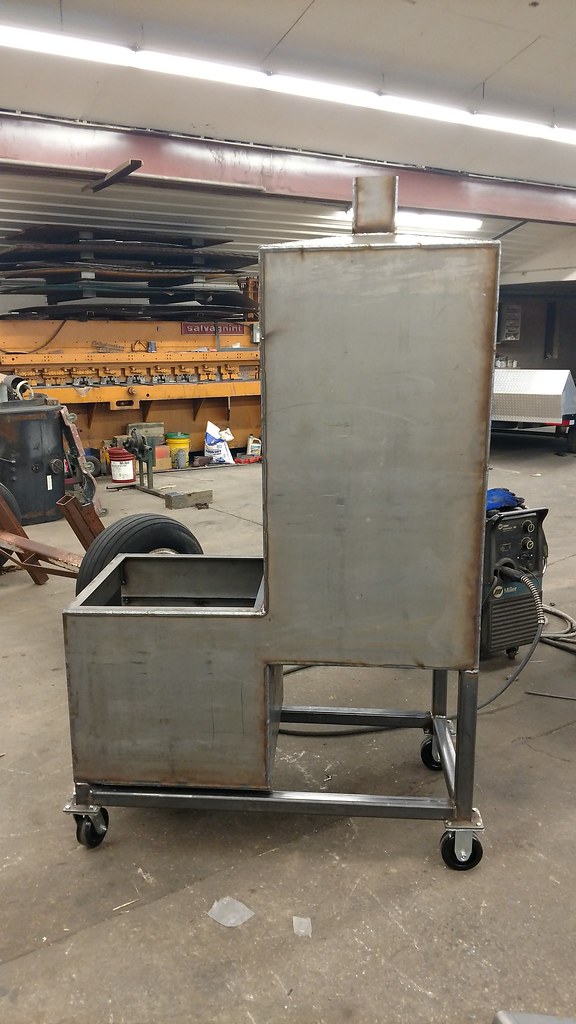
Smoker, some assembly required :biggrin1: Again, forgot how heavy steel is, the door alone is about 75 pounds before reinforcing ribs, thermometers, handle, etc. Fabrication isn't my full time job, just a hobby. My full-time job is flying airplanes, and this is my first time in the shop in over a year, so it's a good workout :loco:
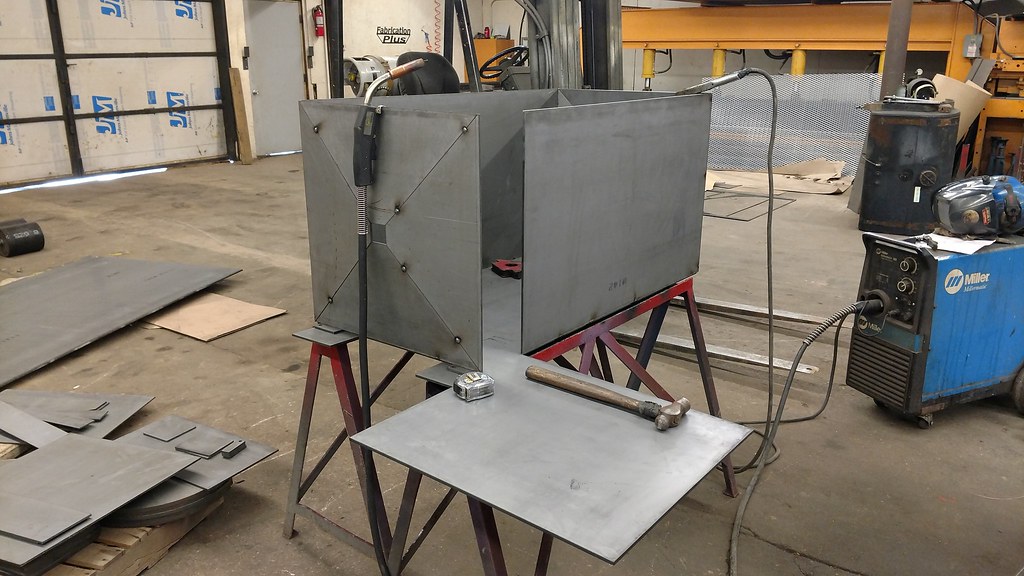 start tacking
The start of tacking everything together. I was really happy to see I remembered enough geometry from high school 16 years ago. I was worried the sloped top and bottom would be off, but surprisingly they fit perfectly.
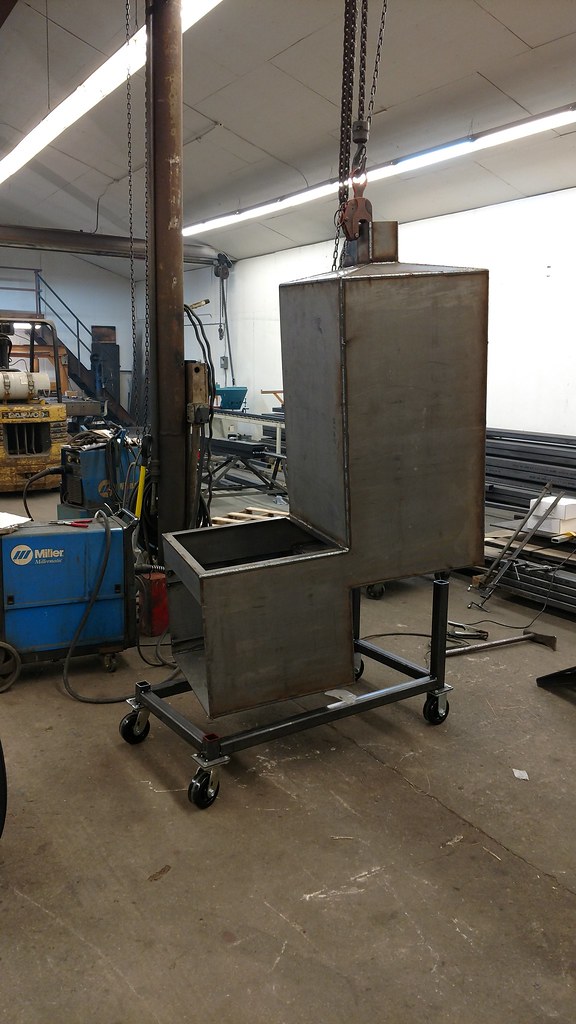
 bottom
Bottom view of day 1 progress.
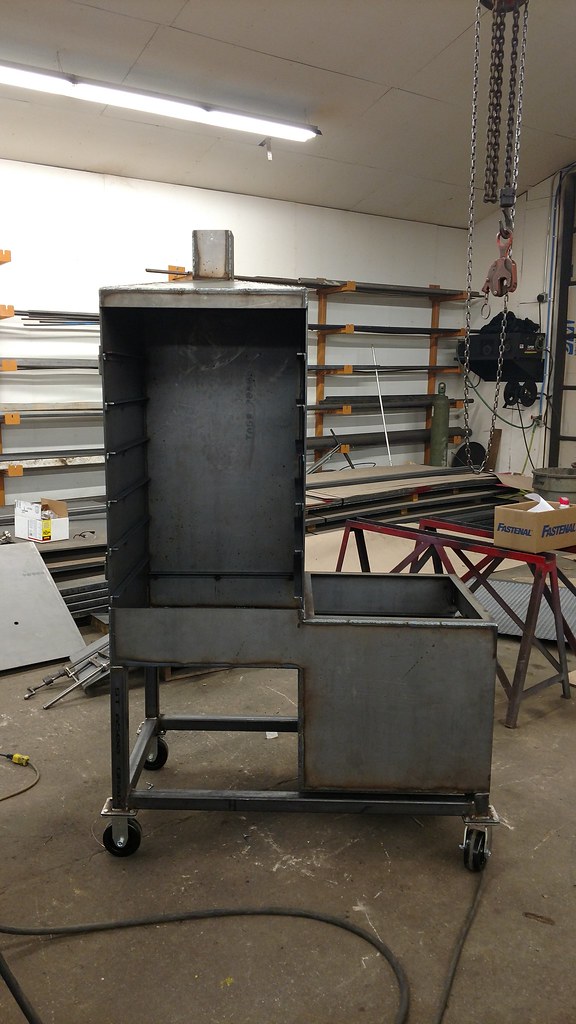
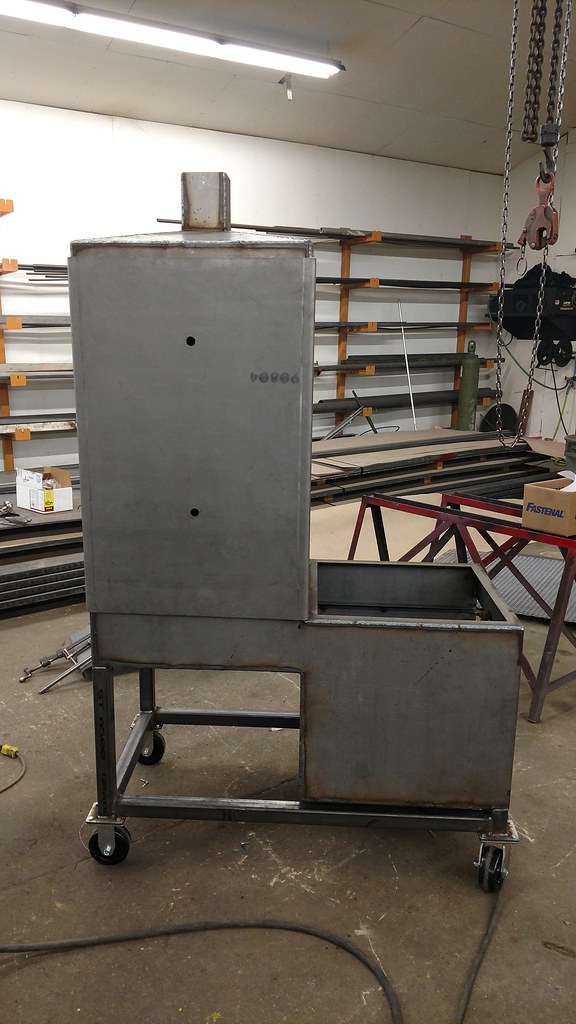
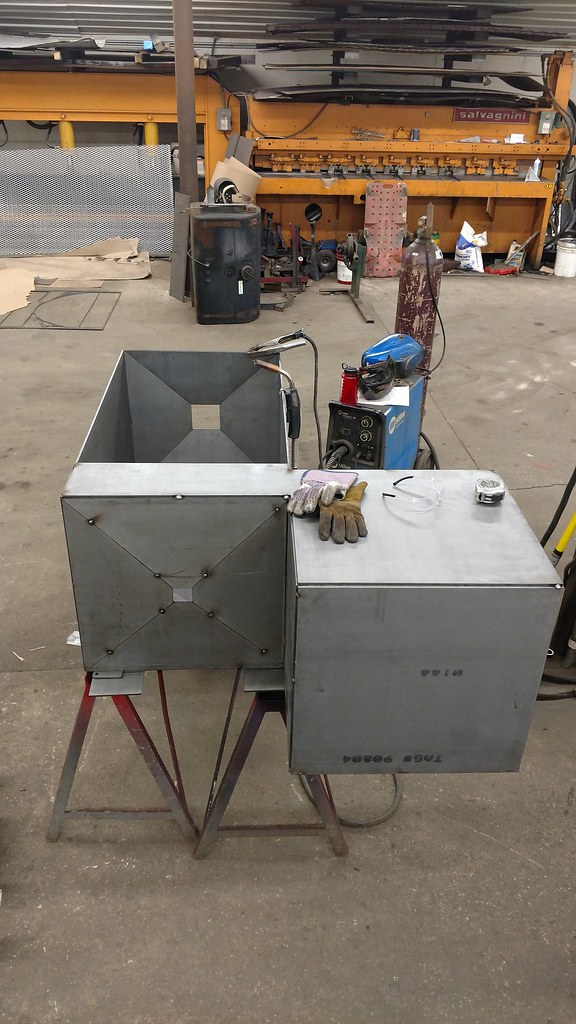
 top
top
Top view of day 1 progress.
A good friend of mine owns a fabrication shop, so I have access to a CNC plasma cutter, brakes, shears, tubing benders, a roll press, a full machine shop and more welders (MIG, TIG, Stick, and gas torches) than I know what to do with. He's been welding since he was 7 or 8 years old and his son is following in his footsteps. It's really cool to see a family business like this and the shared passion for building things. Needless to say they'll both be enjoying a lot whatever I burn inside the new cooker :grin:
So far, here's the total investment:
$79.90 for two 4" Tel-tru glow in the dark thermometers
$39.21 for three 6" stainless coil handles and gasket for the door
2.5 hours drawing in CAD (OK, more like an hour drawing and an 1.5 hours remembering geometry and how to use the CAD software)
4.5 hours fab time, loading and unloading steel, processing scrap, and initial tack weld assembly (probably 45 minutes was well spent playing with the dogs and chatting with different people that came in)
I'm anxiously awaiting tomorrow to finish welding/assembly. Thursday should be paint, the seasoning it this weekend!
Thanks to everyone on this site that I read posts from about different builds and cookers. This is a great resource and community. A huge thanks to my friend. Without being able to use his shop, I'd be struggling with my old stick welder and acetylene torch.
SketchThe initial sketch. I made a couple small changes when I started drawing in CAD. I lowered the angle of the roof a bit and shortened the firebox height to 22" to make the chimney damper easier to reach. I made a sloped floor to facilitate draining and will put a gate valve there. Still deciding what to do for wheels/tires. Right now solid wheelbarrow tires on the heavy end and industrial swivel casters for the light end are winning.
Cad CAD drawing showing all the parts. I forgot the rim for the grill top and cut it out later this afternoon.
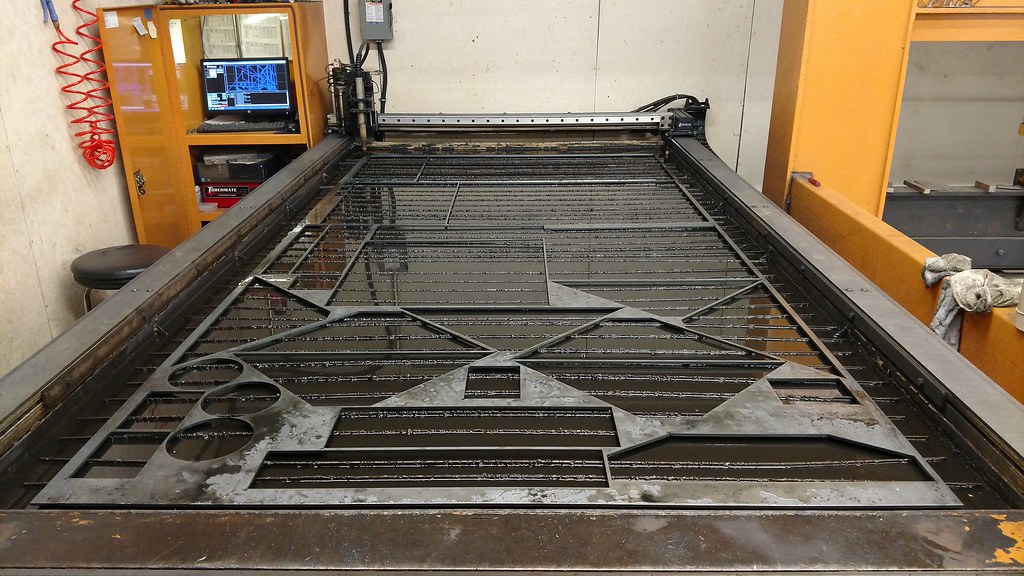
tool paths Imported the G-code to the plasma table computer, this is what the toolpaths look like when the parts are all nested to make the most efficient use of the sheet. The dashed lines are tool movement without a cut, the solid lines are where the torch is on and the fun is happening. I cut it (1/4" steel) at 65 amps and 90 inches per minute. We can hot rod the machine a bit and get more speed, but cut quality suffers. Total cutting time: 27 minutes.
Steel Two sheets of 5'x10'x1/4" steel and one 4'x8' sheet of #9x3/4" rolled flat angle iron. I forgot how heavy this stuff is, just over 500 pounds per sheet!
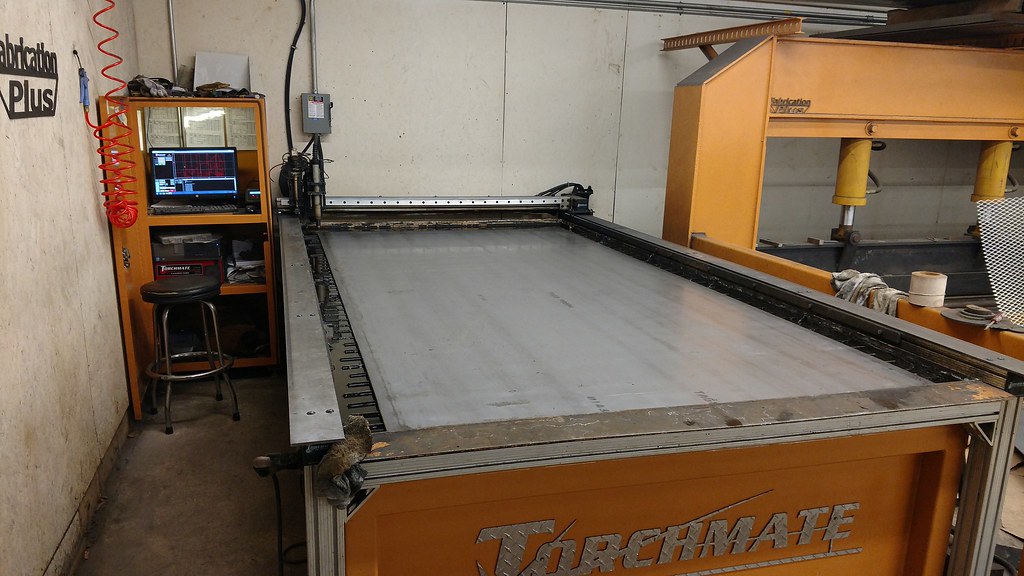
before cutOn the table, ready to start burning some steel!
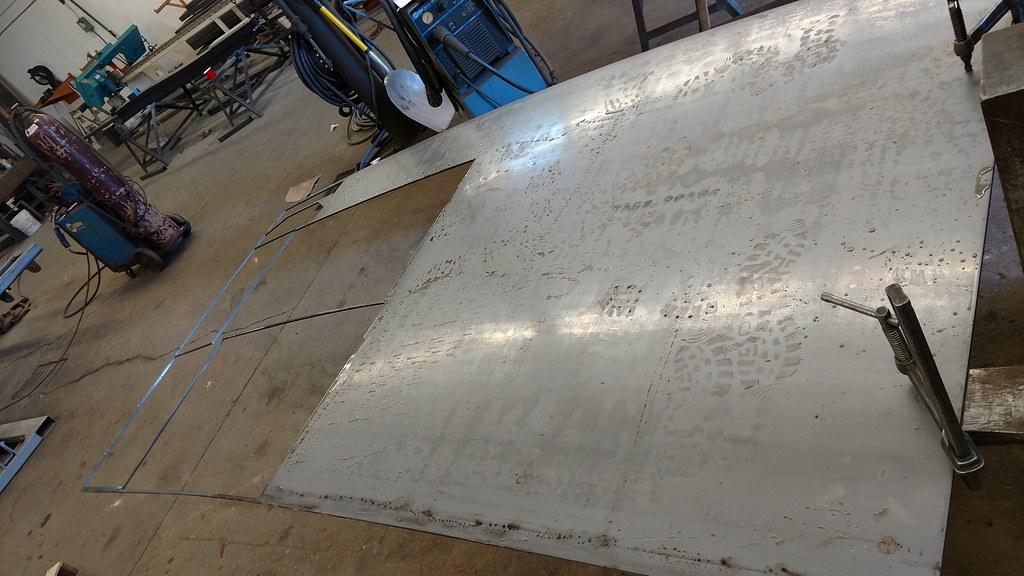
Sheet 1What's left of the first sheet, very little scrap. The cuts are really clean. The little slag that's on the back knocks right off with a putty knife. The water table does a great job keeping the smoke and molten metal under control and the parts come off nice and cool.
Sheet 2Sheet two off the table. It'll soon be back up there to cut out the grill rim I forgot.
pile o partsSmoker, some assembly required :biggrin1: Again, forgot how heavy steel is, the door alone is about 75 pounds before reinforcing ribs, thermometers, handle, etc. Fabrication isn't my full time job, just a hobby. My full-time job is flying airplanes, and this is my first time in the shop in over a year, so it's a good workout :loco:
start tacking The start of tacking everything together. I was really happy to see I remembered enough geometry from high school 16 years ago. I was worried the sloped top and bottom would be off, but surprisingly they fit perfectly.
bottomBottom view of day 1 progress.
topTop view of day 1 progress.
A good friend of mine owns a fabrication shop, so I have access to a CNC plasma cutter, brakes, shears, tubing benders, a roll press, a full machine shop and more welders (MIG, TIG, Stick, and gas torches) than I know what to do with. He's been welding since he was 7 or 8 years old and his son is following in his footsteps. It's really cool to see a family business like this and the shared passion for building things. Needless to say they'll both be enjoying a lot whatever I burn inside the new cooker :grin:
So far, here's the total investment:
$79.90 for two 4" Tel-tru glow in the dark thermometers
$39.21 for three 6" stainless coil handles and gasket for the door
2.5 hours drawing in CAD (OK, more like an hour drawing and an 1.5 hours remembering geometry and how to use the CAD software)
4.5 hours fab time, loading and unloading steel, processing scrap, and initial tack weld assembly (probably 45 minutes was well spent playing with the dogs and chatting with different people that came in)
I'm anxiously awaiting tomorrow to finish welding/assembly. Thursday should be paint, the seasoning it this weekend!
Thanks to everyone on this site that I read posts from about different builds and cookers. This is a great resource and community. A huge thanks to my friend. Without being able to use his shop, I'd be struggling with my old stick welder and acetylene torch.