Sixeight
Knows what a fatty is.
I hate to post another UDS, but I am extremely excited I beat the "Liner of Doom". I picked up a $20 drum well before I had researched enough to know what to get. When I dug a little deeper and heard about the liner I got a little nervous. There were so many conflicting posts on numerous sites about burning it, torching it, and leaving it that my head was spinning. I contacted the manufacturer and got word that the liner was safe and inert, but the purist in me had to get it out. It may have been the competitor in me too!
Two hard wood pallets were broken down and put in the drum. I used my weed torch to get everything going and also made a few rounds around the drum. The drum was hot for two days and had enough hot coal late on the second day to start a small fire for smores...yum. Once the drum cooled I looked in and the inside was still red. I just about lost it!! Then I remembered on one of my study sessions someone broke out the commit cleaner and a scrub pad and the liner came right out (once burned). Darn if it didn't clean right out.
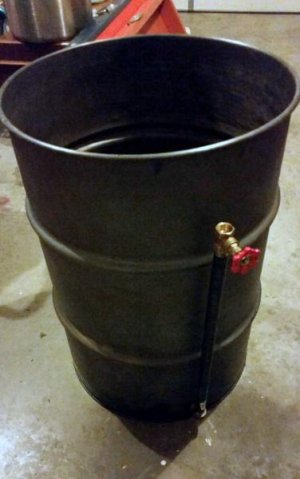
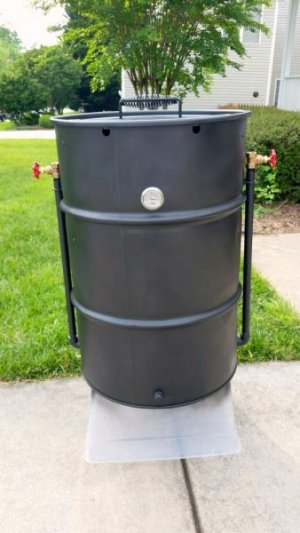
I thought I had a before picture, but must not have saved it. The drum was bright blue with the red liner. Now she is Grey all over! I have installed one 3/4" x 24" intake with a valve. The second will be put in today (threads were jacked up so I need to replace the pipe). I have a third intake where I'll install my PID contolled fan. I am a tinkering fool so I have all types of gadgets and part laying around. The PID is actually one I ordered by accident while making my curing chamber for capicolas and sausage. It runs a small fan perfectly. It's a work in progress!
Two hard wood pallets were broken down and put in the drum. I used my weed torch to get everything going and also made a few rounds around the drum. The drum was hot for two days and had enough hot coal late on the second day to start a small fire for smores...yum. Once the drum cooled I looked in and the inside was still red. I just about lost it!! Then I remembered on one of my study sessions someone broke out the commit cleaner and a scrub pad and the liner came right out (once burned). Darn if it didn't clean right out.
I thought I had a before picture, but must not have saved it. The drum was bright blue with the red liner. Now she is Grey all over! I have installed one 3/4" x 24" intake with a valve. The second will be put in today (threads were jacked up so I need to replace the pipe). I have a third intake where I'll install my PID contolled fan. I am a tinkering fool so I have all types of gadgets and part laying around. The PID is actually one I ordered by accident while making my curing chamber for capicolas and sausage. It runs a small fan perfectly. It's a work in progress!