metallurgynerd
MemberGot rid of the matchlight.
New member here. I did the cattle call thing, but also wanted to post my first smoker build that finished up this past weekend. Been cooking with a PBC for a few years but wanted something with more capacity, better for all-weather (I'm in Canada, it gets pretty cold :shocked , more fuel efficient, cleaner burn, low temp capability for smoking homemade sausage, easier to clean out and refuel, longer burn time, etc. I know, sounds like I want it all. So I decided to try my hand at converting an old fridge into a gravity-feed charcoal smoker. I was going for some of the benefits of a Stumps-type smoker without the cost, plus those old fridges look pretty neat. I picked up various off-cuts of steel square tube and flat bar, weldable hinges, some aluminum plate and angle, a chimney cap and duct fittings, already had some casters laying around, and got to work. I'm a metallurgist and welding engineer by profession but I'm certainly not a welder, so feel free to laugh at my ugly welds and feel better about your own. Anyway, I dubbed the new smoker "The Viking" since it's an old Eaton Viking fridge, and finished the first smoke yesterday. Everything worked great other than I think I need to modify the charcoal grate a bit so the ash falls through a little better. And I'm ordering an Auber wifi controller for it, just for the set and forget convenience that comes in handy on a busy Saturday with the family. The Viking holds steady temps, including low temps (had it down to 130°F for hours), burns clean, and fits one 15lb bag of Kingsford charcoal for a 20+hr burn at 225°F. Overall I'm very pleased with it.
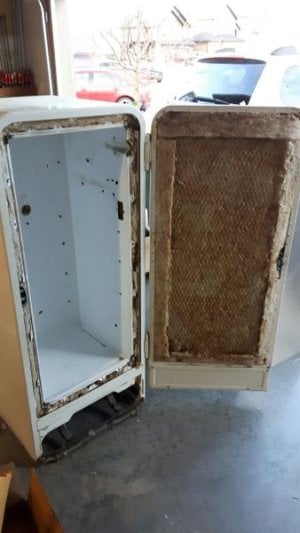
Here's the 1954 Eaton Viking fridge I picked up for free. Ripped out all the plastic bits and blocked off all the holes with flashing and high-temp silicone.
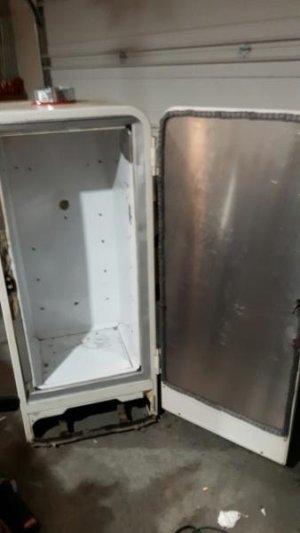
Fridge with aluminum plate door liner and fiberglass gasket installed.
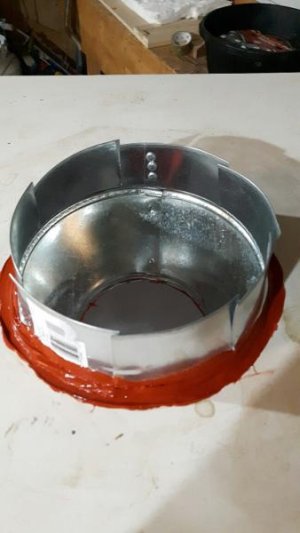
I used a 6x4 reducer duct for the top vent. I bought an aftermarket chimney cap for a BGE and it fits perfectly over the 6" end (in pics below).
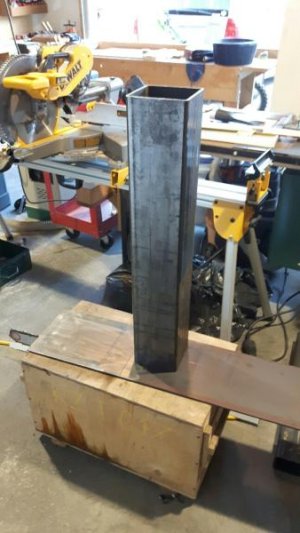
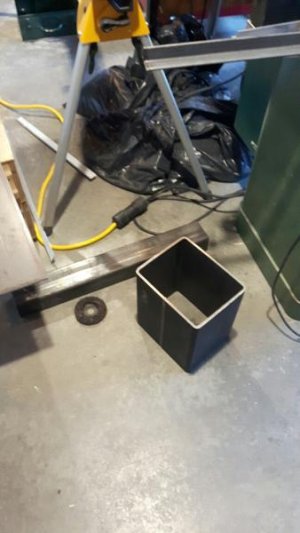
Starting materials for the firebox assembly.
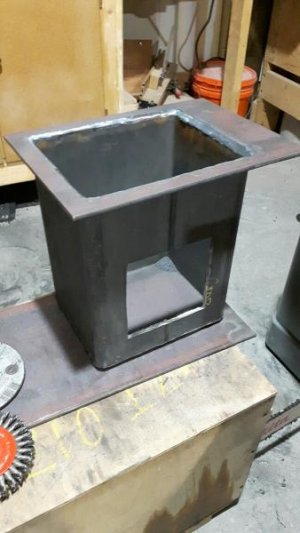
Ash box ready for charcoal chute attachment.
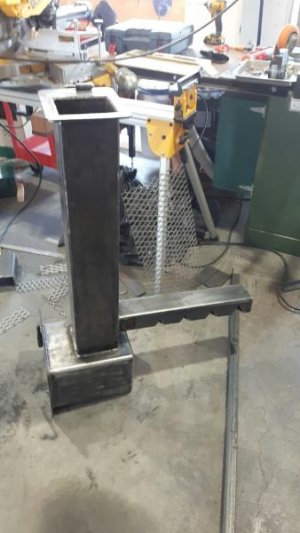
Skipped some steps, but here's the charcoal chute, heat transfer tube and ash box welded up. The heat transfer tube has a series of diamond-shaped cuts on the underside that get progressively larger to the outboard end. The height from the bottom of the fire grate to the bottom of the heat transfer tube is about 2 inches.
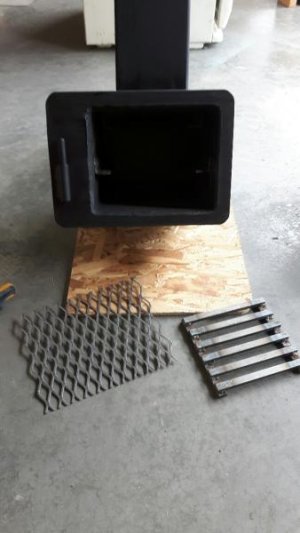
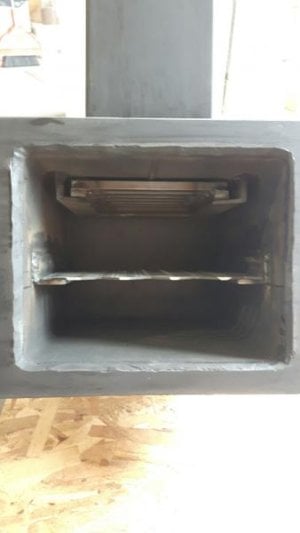
I made the charcoal grate from rectangular stock and also added a lower grate halfway up the ash box to place hardwood chunks on, hoping it would keep them from getting completely buried in ash. Also makes a good place to put a wad of paper for lighting the charcoal if you don't want to use a propane torch.
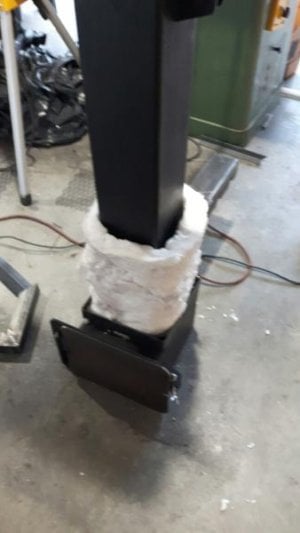
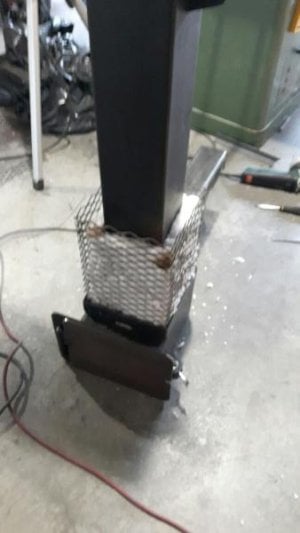
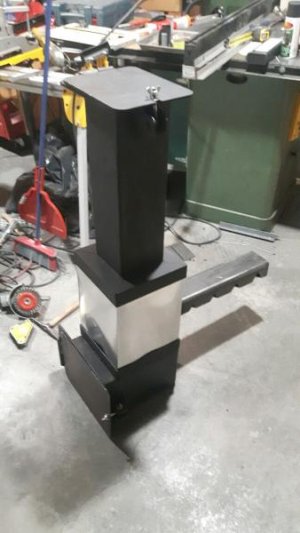
I insulated the hottest section of the firebox with ceramic refractory held in place with expanded metal mesh. Seemed like a good idea. Then I covered it with flashing to keep rain out and insulation in. Also built the doors for the charcoal chute and ash box.
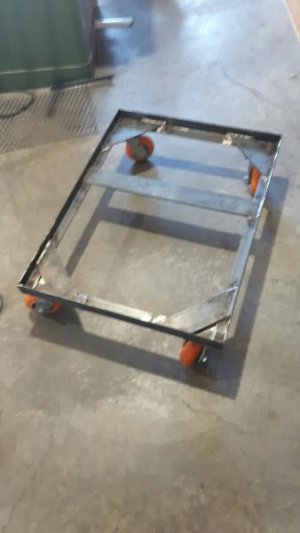
Base with casters. Cross-supports are spaced so that the fridge can be bolted down. Width is such that the ash box hangs over the end so you can slip an ash bucket under for easy ash removal.
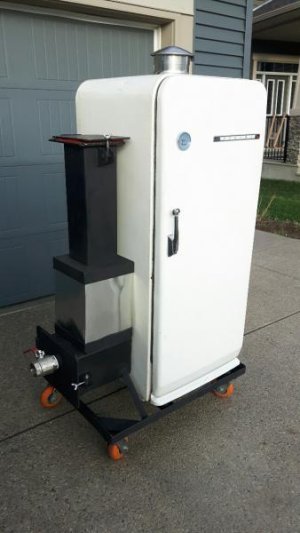
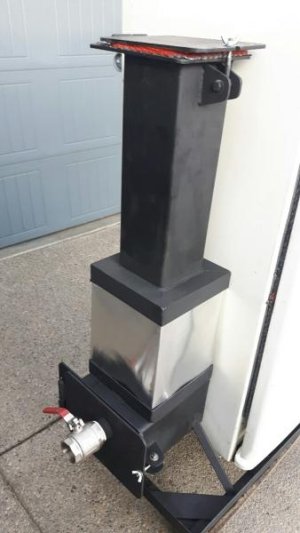
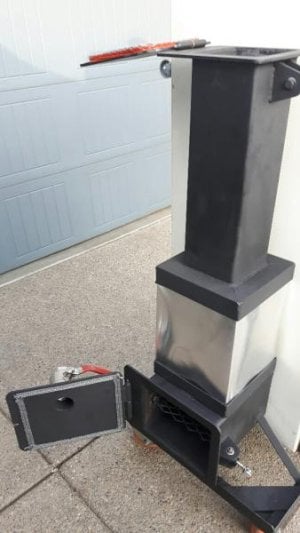
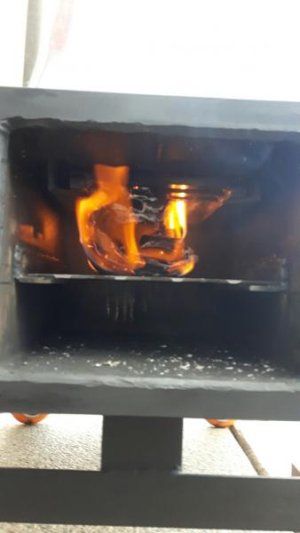
Everything assembled and finished. Skipped some steps here as well. Added a 2" ball valve and gasket to the ash box door. Added gaskets to the charcoal chute door. Cut holes in side of fridge and slid firebox assembly in. Used a car jack to position the firebox while welding up supports. Everything sprayed with flat black BBQ paint. Chimney cap on.
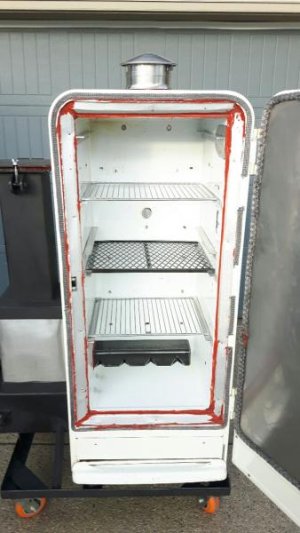
Inside with metal trim added to the front edge. More of that wonderful high-temp silicone. Red was the cheapest, and I figured it'll all be smoke-colored soon enough. Currently using the two original fridge racks and built a third one from expanded metal and small angle iron. In addition to three racks, I added extra shelf supports at the top and halfway down to be used with hanging rods and meat hooks. Hanging meat to smoke was one of my favorite things about the PBC and I wanted to retain that option here as well.
The upper hanging rod supports will work great for brisket and ribs, and the lower ones can be used in tandem with the upper for shorter stuff like chickens or a bunch of sausage. A grease tray will be built for the bottom, just haven't done it yet. Foil will do in the interim.
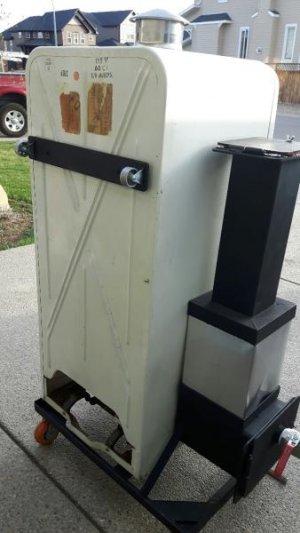
The old fridge had two big bolts that screwed into the back, I think they were for ensuring that the fridge was a few inches away from the wall for proper cooling. Anyway, I used those bolts (cut down) as an anchor point to add some flat bar with castors to the back. The theory is that I can lay this thing down on it's back to load it in a truck and the casters will help with the loading. We'll see if that theory pans out. I figure the whole thing weighs around 300lb, but don't know for sure.

Here's the 1954 Eaton Viking fridge I picked up for free. Ripped out all the plastic bits and blocked off all the holes with flashing and high-temp silicone.

Fridge with aluminum plate door liner and fiberglass gasket installed.

I used a 6x4 reducer duct for the top vent. I bought an aftermarket chimney cap for a BGE and it fits perfectly over the 6" end (in pics below).


Starting materials for the firebox assembly.

Ash box ready for charcoal chute attachment.

Skipped some steps, but here's the charcoal chute, heat transfer tube and ash box welded up. The heat transfer tube has a series of diamond-shaped cuts on the underside that get progressively larger to the outboard end. The height from the bottom of the fire grate to the bottom of the heat transfer tube is about 2 inches.


I made the charcoal grate from rectangular stock and also added a lower grate halfway up the ash box to place hardwood chunks on, hoping it would keep them from getting completely buried in ash. Also makes a good place to put a wad of paper for lighting the charcoal if you don't want to use a propane torch.


I insulated the hottest section of the firebox with ceramic refractory held in place with expanded metal mesh. Seemed like a good idea. Then I covered it with flashing to keep rain out and insulation in. Also built the doors for the charcoal chute and ash box.

Base with casters. Cross-supports are spaced so that the fridge can be bolted down. Width is such that the ash box hangs over the end so you can slip an ash bucket under for easy ash removal.


Everything assembled and finished. Skipped some steps here as well. Added a 2" ball valve and gasket to the ash box door. Added gaskets to the charcoal chute door. Cut holes in side of fridge and slid firebox assembly in. Used a car jack to position the firebox while welding up supports. Everything sprayed with flat black BBQ paint. Chimney cap on.

Inside with metal trim added to the front edge. More of that wonderful high-temp silicone. Red was the cheapest, and I figured it'll all be smoke-colored soon enough. Currently using the two original fridge racks and built a third one from expanded metal and small angle iron. In addition to three racks, I added extra shelf supports at the top and halfway down to be used with hanging rods and meat hooks. Hanging meat to smoke was one of my favorite things about the PBC and I wanted to retain that option here as well.
The upper hanging rod supports will work great for brisket and ribs, and the lower ones can be used in tandem with the upper for shorter stuff like chickens or a bunch of sausage. A grease tray will be built for the bottom, just haven't done it yet. Foil will do in the interim.

The old fridge had two big bolts that screwed into the back, I think they were for ensuring that the fridge was a few inches away from the wall for proper cooling. Anyway, I used those bolts (cut down) as an anchor point to add some flat bar with castors to the back. The theory is that I can lay this thing down on it's back to load it in a truck and the casters will help with the loading. We'll see if that theory pans out. I figure the whole thing weighs around 300lb, but don't know for sure.


