TXM489
Knows what a fatty is.
After weeks of going back and forth of visiting all pitmakers in Houston, and scouring online, I decided on the Old Country Wrangler from Academy for $500. For the price point I don't think it can be beat as I didn't want to drop $2500 or more on my first rig. I looked constantly on CL to see if I could catch a deal, but no dice. The wrangler is 3/16 steel with a 20x30 cooking chamber and a 20x18 firebox It also had a heat baffle, which was a big selling point for me. Pic 4 shows the baffle, that plate butted up to the baffle Pops gave me and that I'm using it as a diffuser. Another nice feature is the sliding grates on cooking chamber and firebox. Firebox also has a plate with air holes so that the ash doesn't sit on bottom if you forget. Cooking chamber also has a top half rack, for me this could be a tad bit lower. It has two wagon wheels on firebox side with a big handle opposite for easy manuvering and two posts on other end slightly lower, with a hole and a hook for drippings. I did 3 seasonings with peanut oil, last one being with charcoal basket I built with expanded metal from HD. All I did for that was bend two 2x1 sheets in a U and bind them together with steel wire twist, my dad had it from the USAF back in the day. The pit weighed about 350 and only took a friend and I to unload it from the truck. Overall impressed with it "out the box". It is an all welded construction, the lids fit fairly nice, but leak. Ordered some Nomex tape to fix that. The butterfly air dampener isn't the best, but I'm learning to control it. Here is a break down of my last burn with charcoal basket using full chimney of lump with briquettes and wood chunks, minion method. *Note to self - lump burns HOT* Smoke stack is full open all burn and air dampener is full open to start. With tweaking and practice I can have this pit dialed in. Pics below, so it did happen!:biggrin1:
Thanks for looking yall!
5:08 150* after pouring chimney
5:15 200*
5:16 230* put air dampener at 1/4 to see what happens
5:18 215* dropped pretty quick so opened back up to 1/2
5:25 245* Threw in an oven therm, read 220*
5:55 430* had dinner and wasn't watching, surprised at how much it jumped
closed dampener all way, grate read 450*
6:00 350* Shocked it dropped so quick, but where I was aiming for
6:15 300* grate was 275*
6:30 270*
7:00 250* grate at 225*
7:30 240*
8:00 215* grate at 200*
8:30 200* went to lay down after this but basket still had coals in basket
Attachments
-
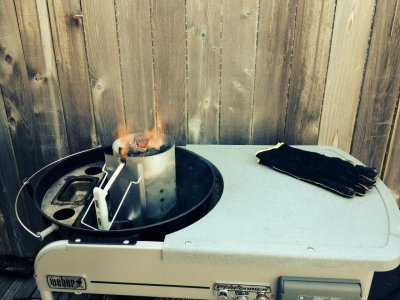 image (1).jpg75 KB · Views: 2,051
 -
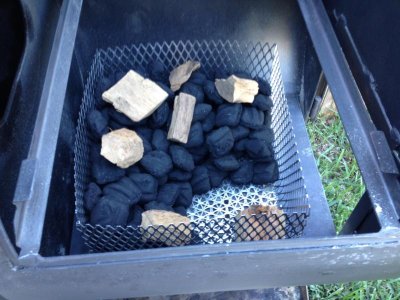 image (2).jpg73.3 KB · Views: 2,035
 -
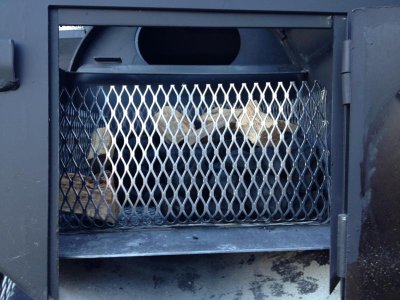 image (3).jpg76.7 KB · Views: 2,034
 -
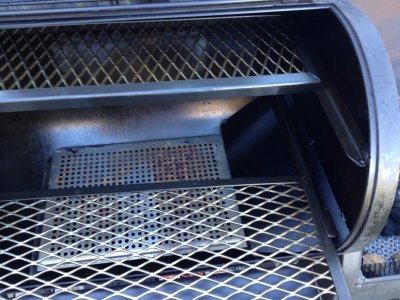 image (4).jpg84.8 KB · Views: 2,040
 -
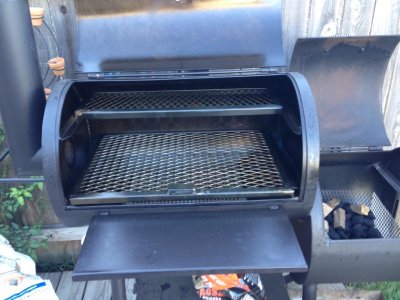 image (5).jpg66.6 KB · Views: 2,031
 -
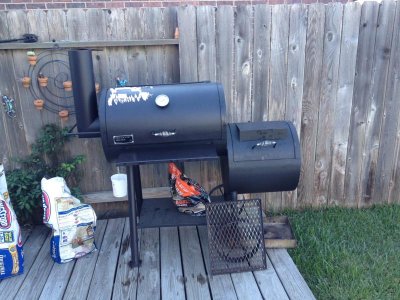 image (6).jpg88.6 KB · Views: 2,042
 -
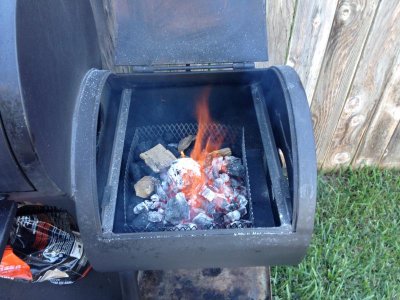 image (7).jpg80.9 KB · Views: 2,035
 -
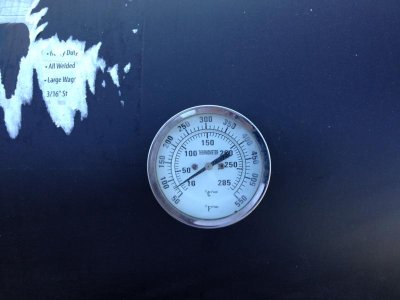 image (8).jpg39.5 KB · Views: 2,036
 -
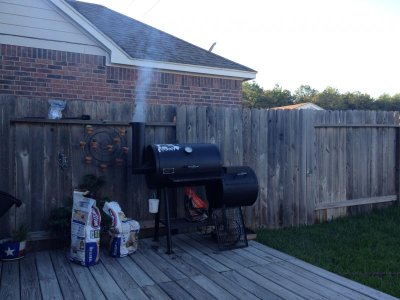 image (9).jpg63.3 KB · Views: 2,044
